Adding GitHub Pull Request Preview Deployments with Coolify
Mar 5th, 2024
12 min read
May 4th, 2024
One of the nice things about Netlify, Vercel, etc. is automatic commit deployments on your main branch. We can use the same manner in Coolify’s feature using “Private Repository with GitHub app”. Not only will we get the benefit of commit deployments, but we can also set it up for Pull Request preview deploys before we make a merge to the main branch.
Let’s cover what we’re going to do:
- Create a subdomain wildcard DNS record inside Cloudflare
- Update the localhost server to use the wildcard domain setting
- Add a Coolify’s Source
- Deploy a resource and configure our application to use Pull Request Previews
- Test Pull Request Previews by creating a Pull Request on GitHub
Update DNS for Wildcard Subdomains
I’m using Cloudflare but whatever you’re using should likely be the same. All you need to do is go to your DNS Records dashboard and enter the details below.
In Cloudflare, navigate to the DNS Records dashboard.
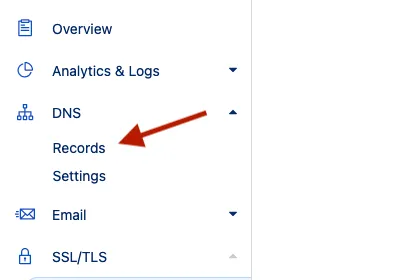
We’ll create a new record by clicking on the add new record button.
A form should pop up, and we’ll enter an “A” record, with a hostname of ”*” and the value of the IP address. I’m using 192.0.2.1, but you’ll replace it with your remote server IP where your Coolify instance is running.
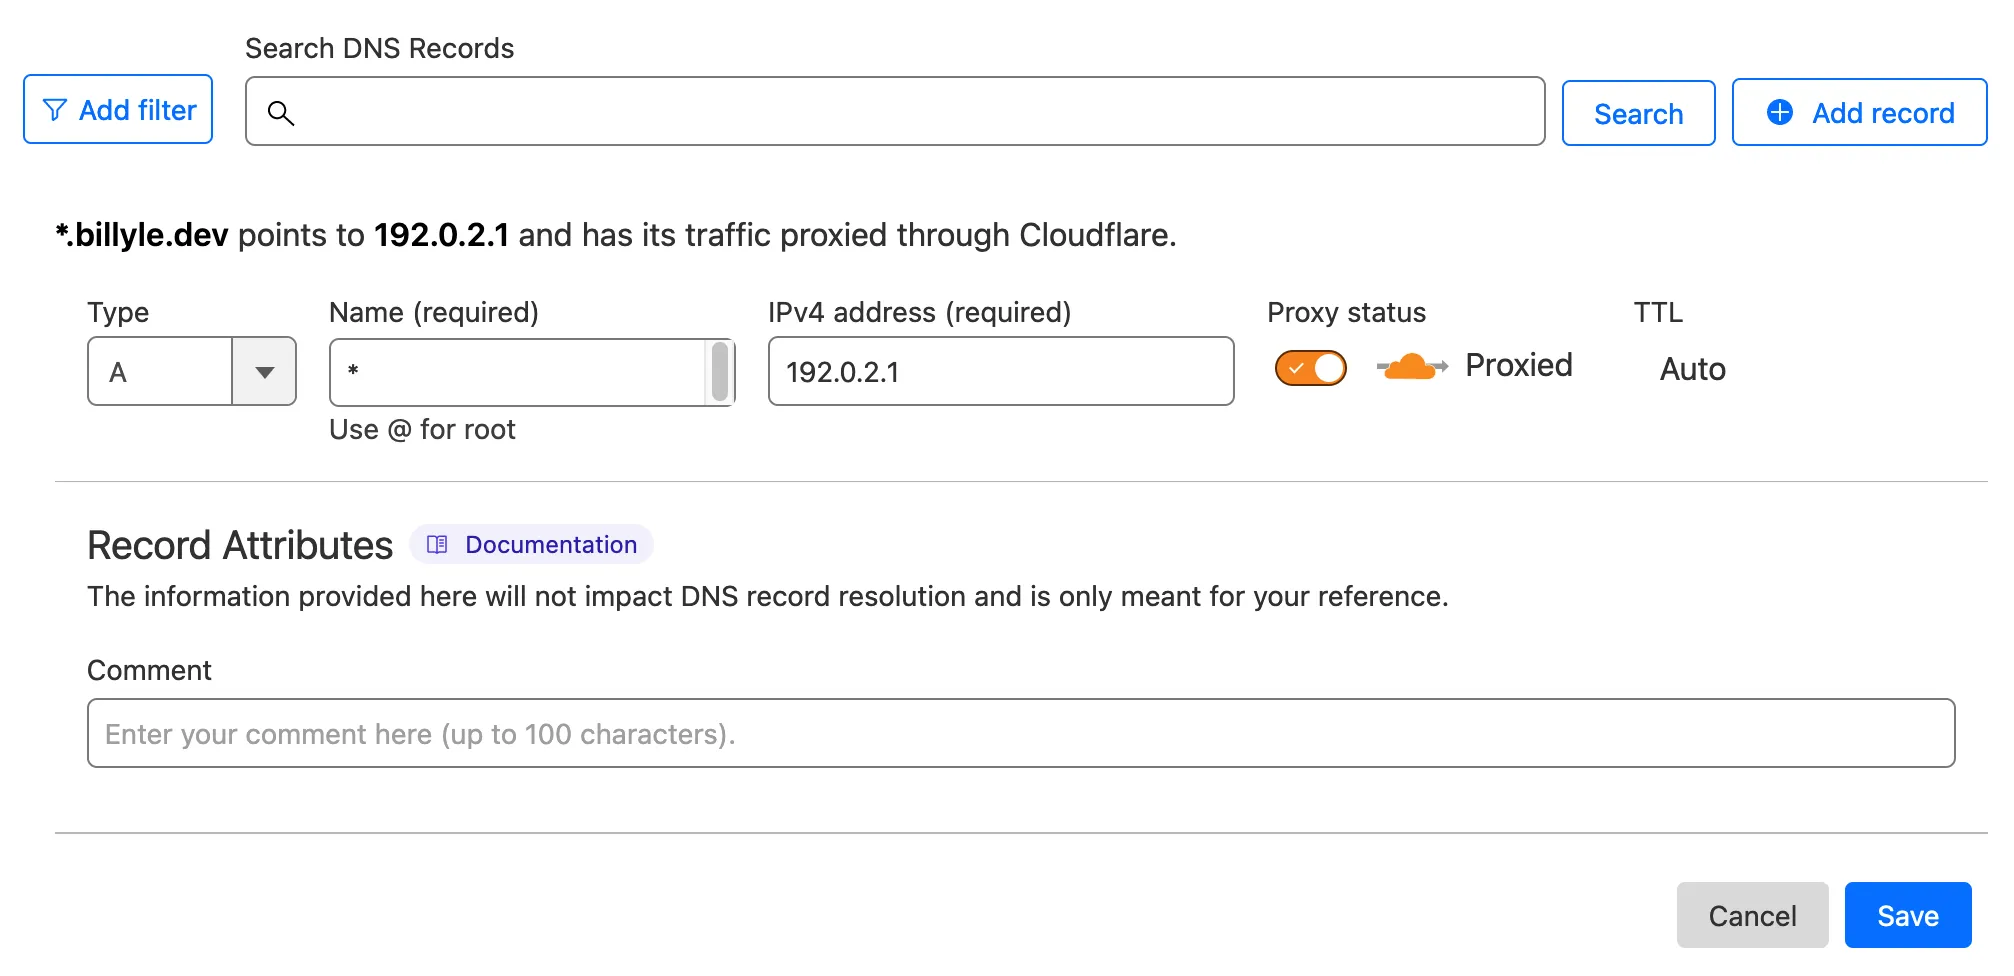
The ”*” represents a catch-all for any subdomain so when we make Pull Requests on GitHub, Coolify will automatically create a Preview Deploy that looks like <subdomain_pr_id>.<your_domain>. You can then click on that URL and be taken to a live instance of your Preview Deploy.
Click save and close Cloudflare since we won’t be accessing them from here.
Allow Coolify to create wildcard domains
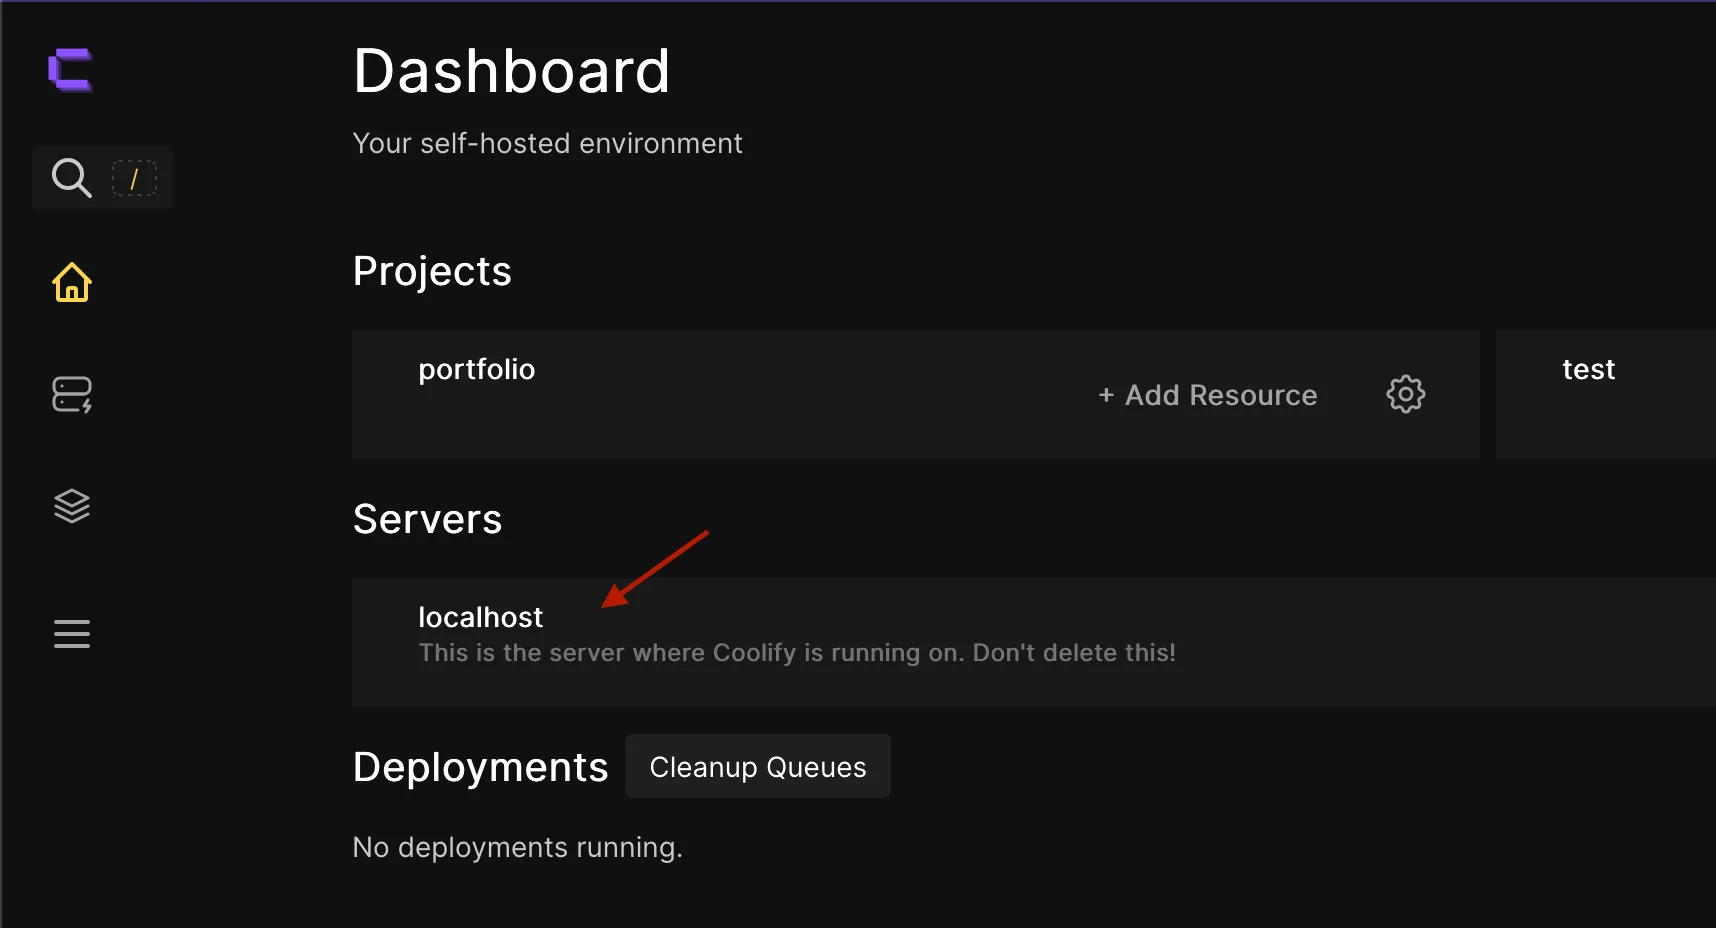
Navigate to your Coolify instance and head over to the server that will handle the wildcard domains. In my case, it is the “localhost” server that Coolify lives on.
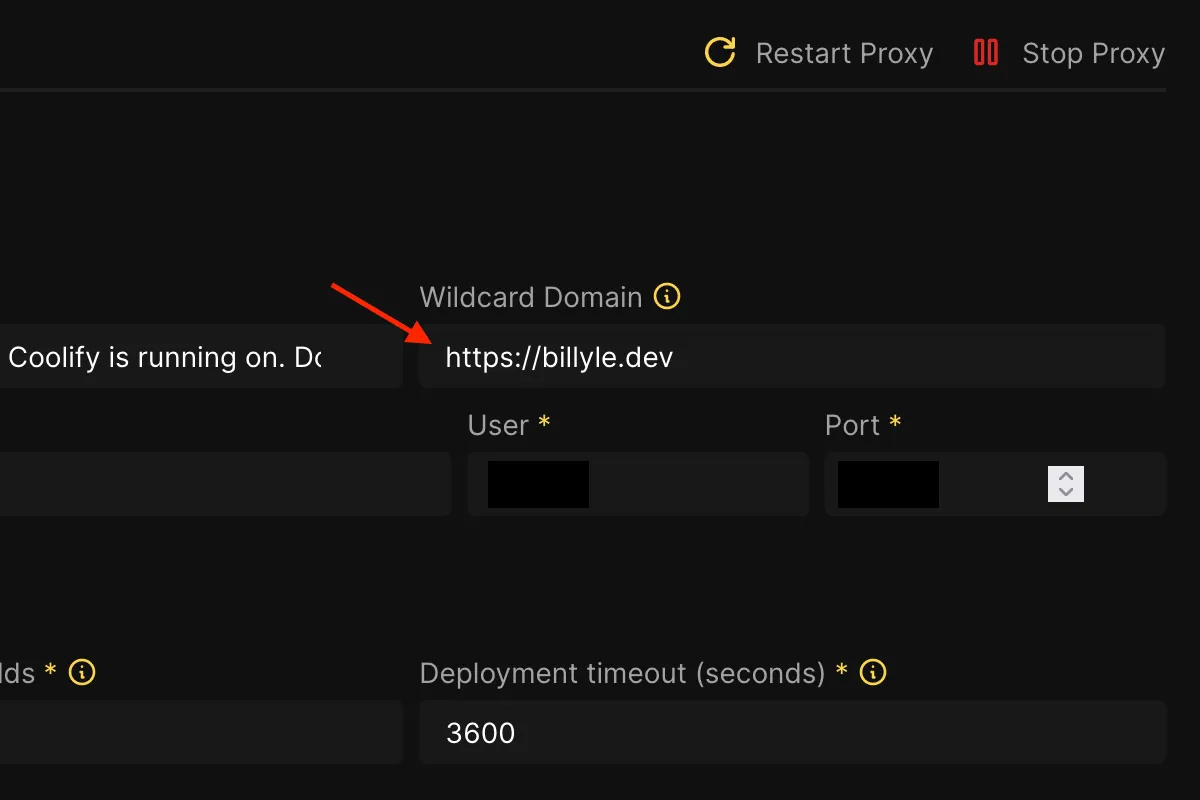
You should see a “Wildcard Domain” field. Let’s update that to use our custom domain URL. I’m using “https://billyle.dev”. Be sure to include the HTTPS protocol.
Some things you need to be sure of are that the wildcard DNS record in your DNS provider is pointing to the server IP where the Coolify instance lives and that the wildcard domain you’re entering is being served by Coolify.
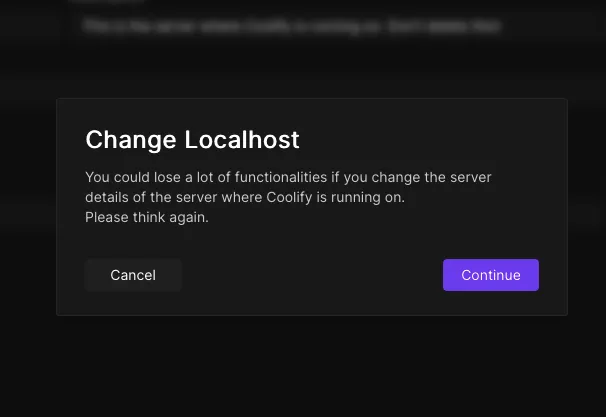
Click save, and a confirmation prompt will display. Click continue.
Creating a Source
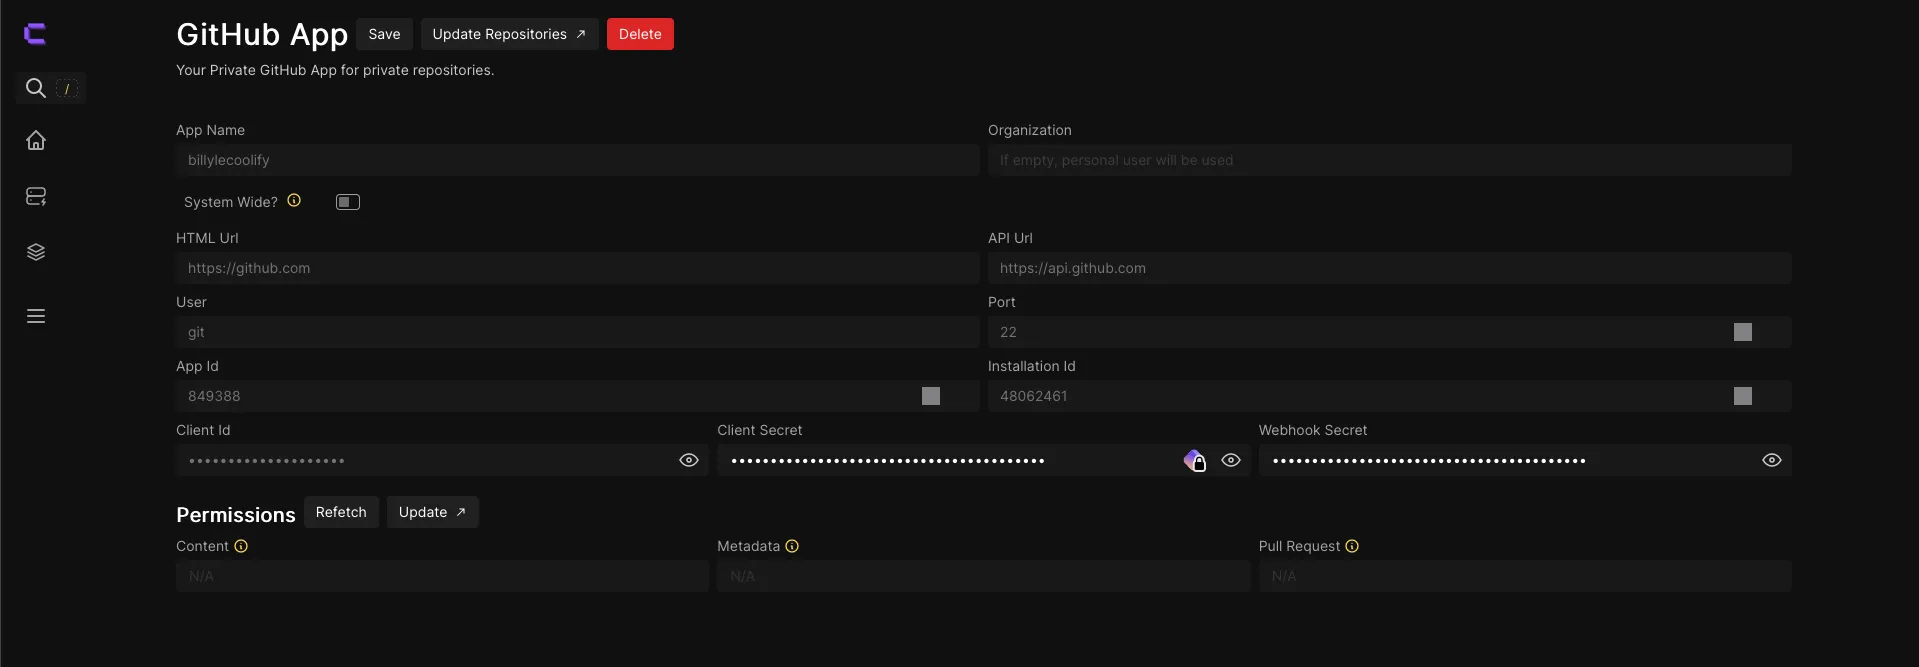
Next up is creating a “Source”. Coolify will create a private GitHub App for you. After creating the GitHub App, Coolify will automatically grab all the details from the GitHub App (App Id, Installation Id, Client Id, Client Secret, and Webhook Secret) and store it as a Source. This GitHub App later will ask your GitHub account to permit it to watch for Pull Requests and commits to the main branch.
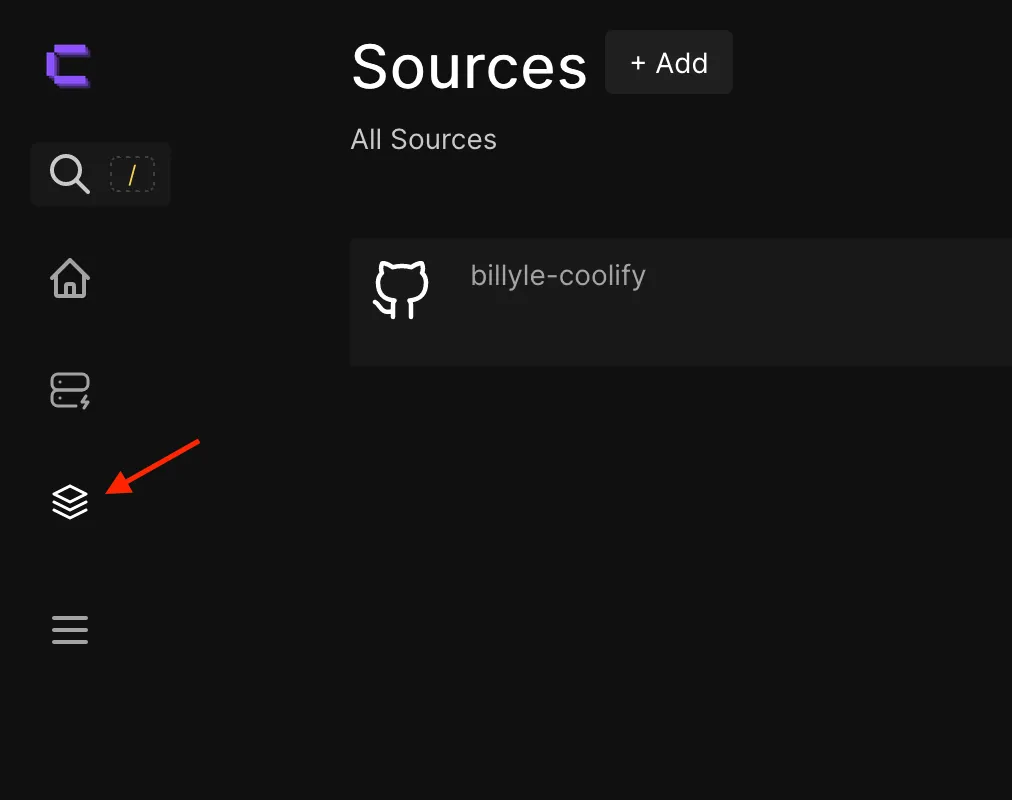
Head over to the Sources page, so we can create one.
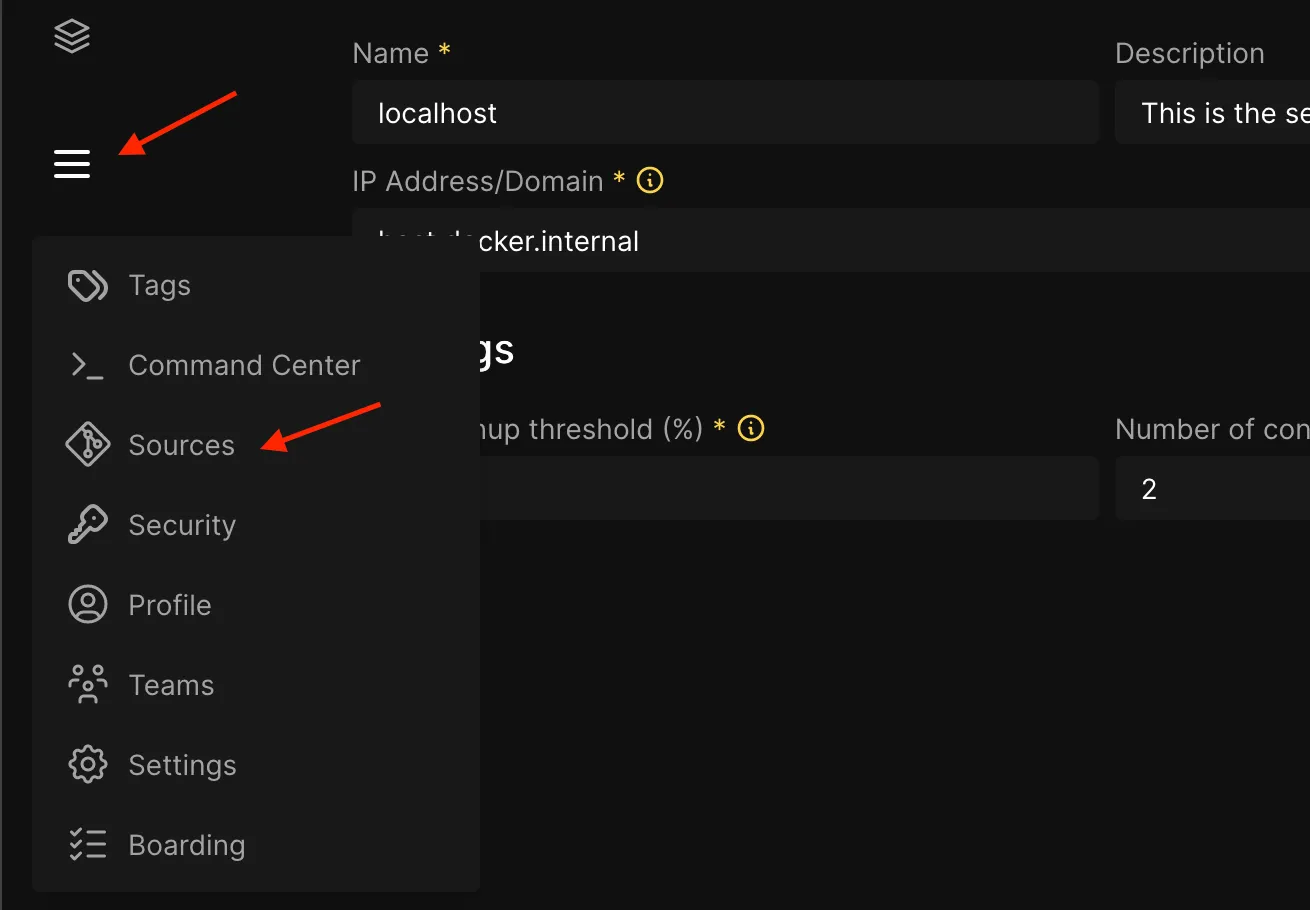
Click on ”+ Add” and you’ll be taken to a different screen, and you’ll enter some details about the GitHub you’re about to create.
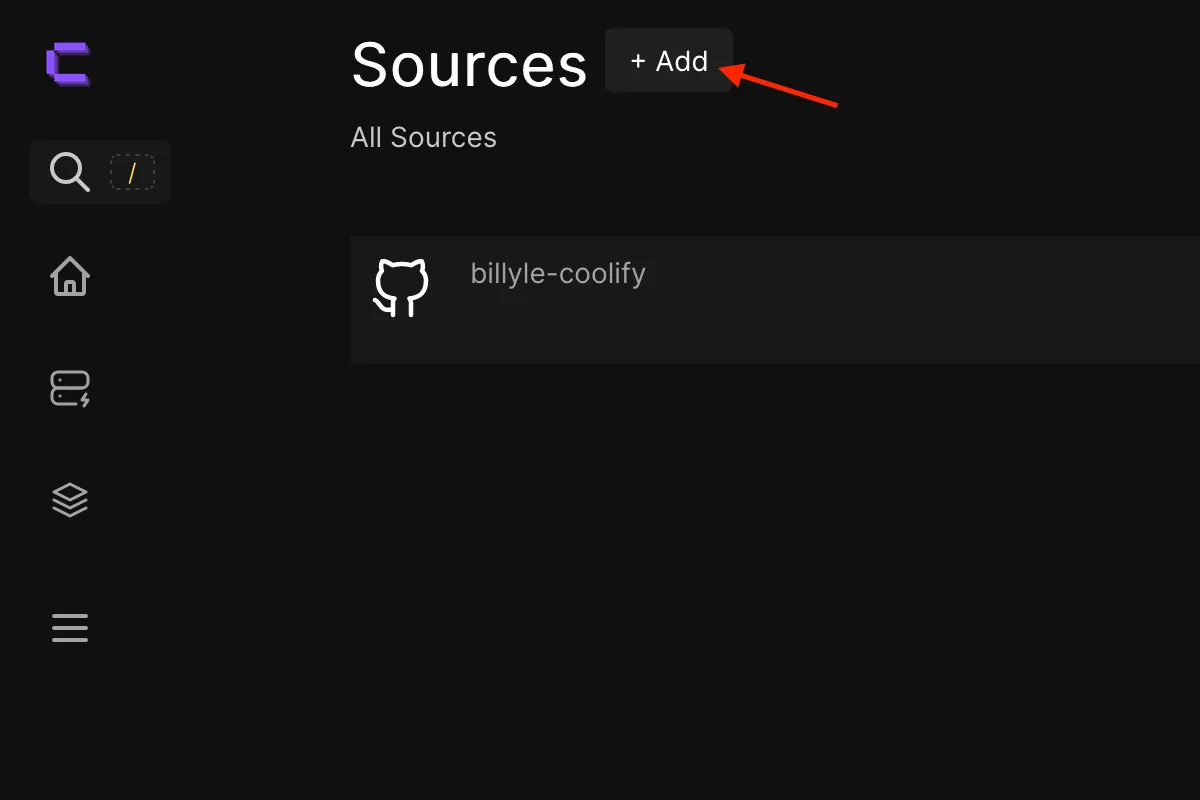
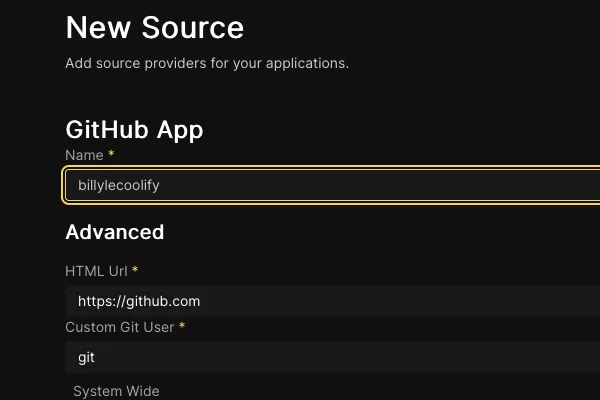
We’re only going to change the name of the GitHub App to something more recognizable. I’m using “billylecoolify”. Click continue.
The next screen is where Coolify needs to register the GitHub App. Before we do that, we’re going to change the “Webhook Endpoint” so we don’t expose our remote server IP to the world. I’m using the domain where my Coolify instance lives.
We also want to turn on “Preview Deployments” for this Source so be sure to toggle that on.
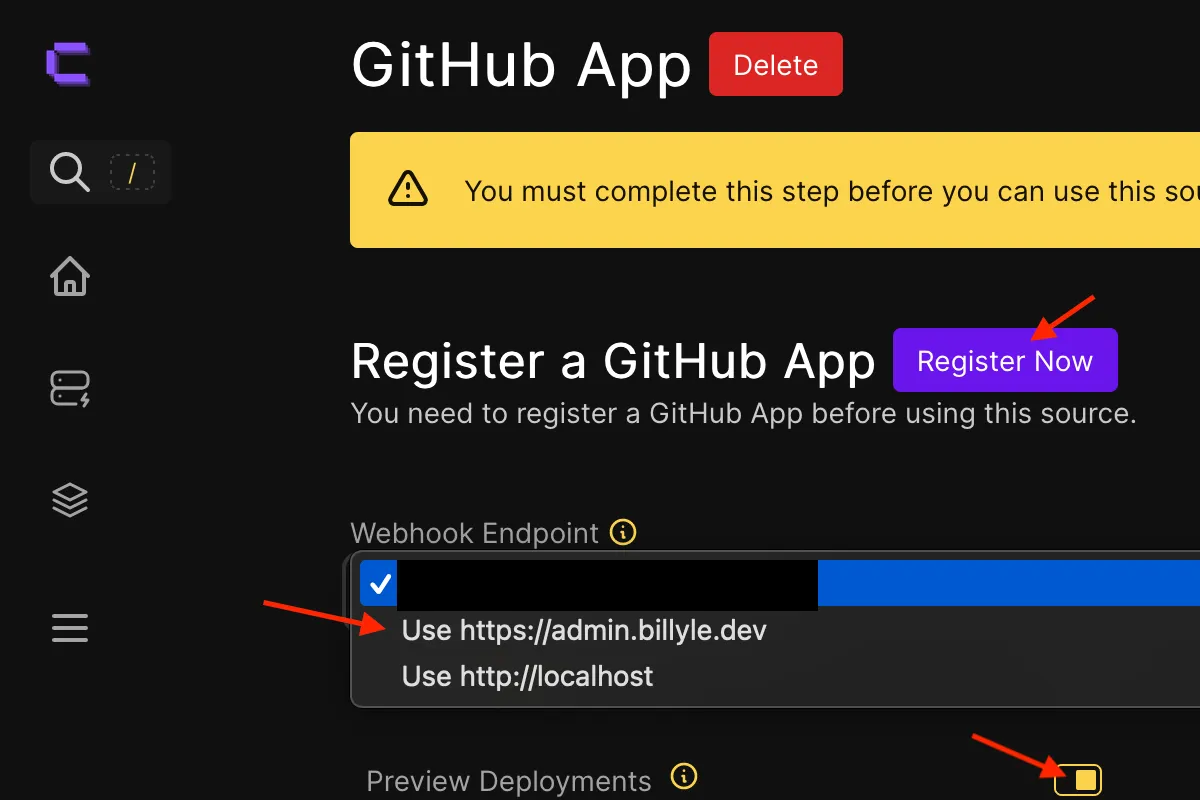
After completing the steps above, click on “Register Now”.
You should be taken to a GitHub page in the browser where it will ask you to log in. I have 2FA set up so this screen may be different for you. Just enter your details, and you should be good to go.
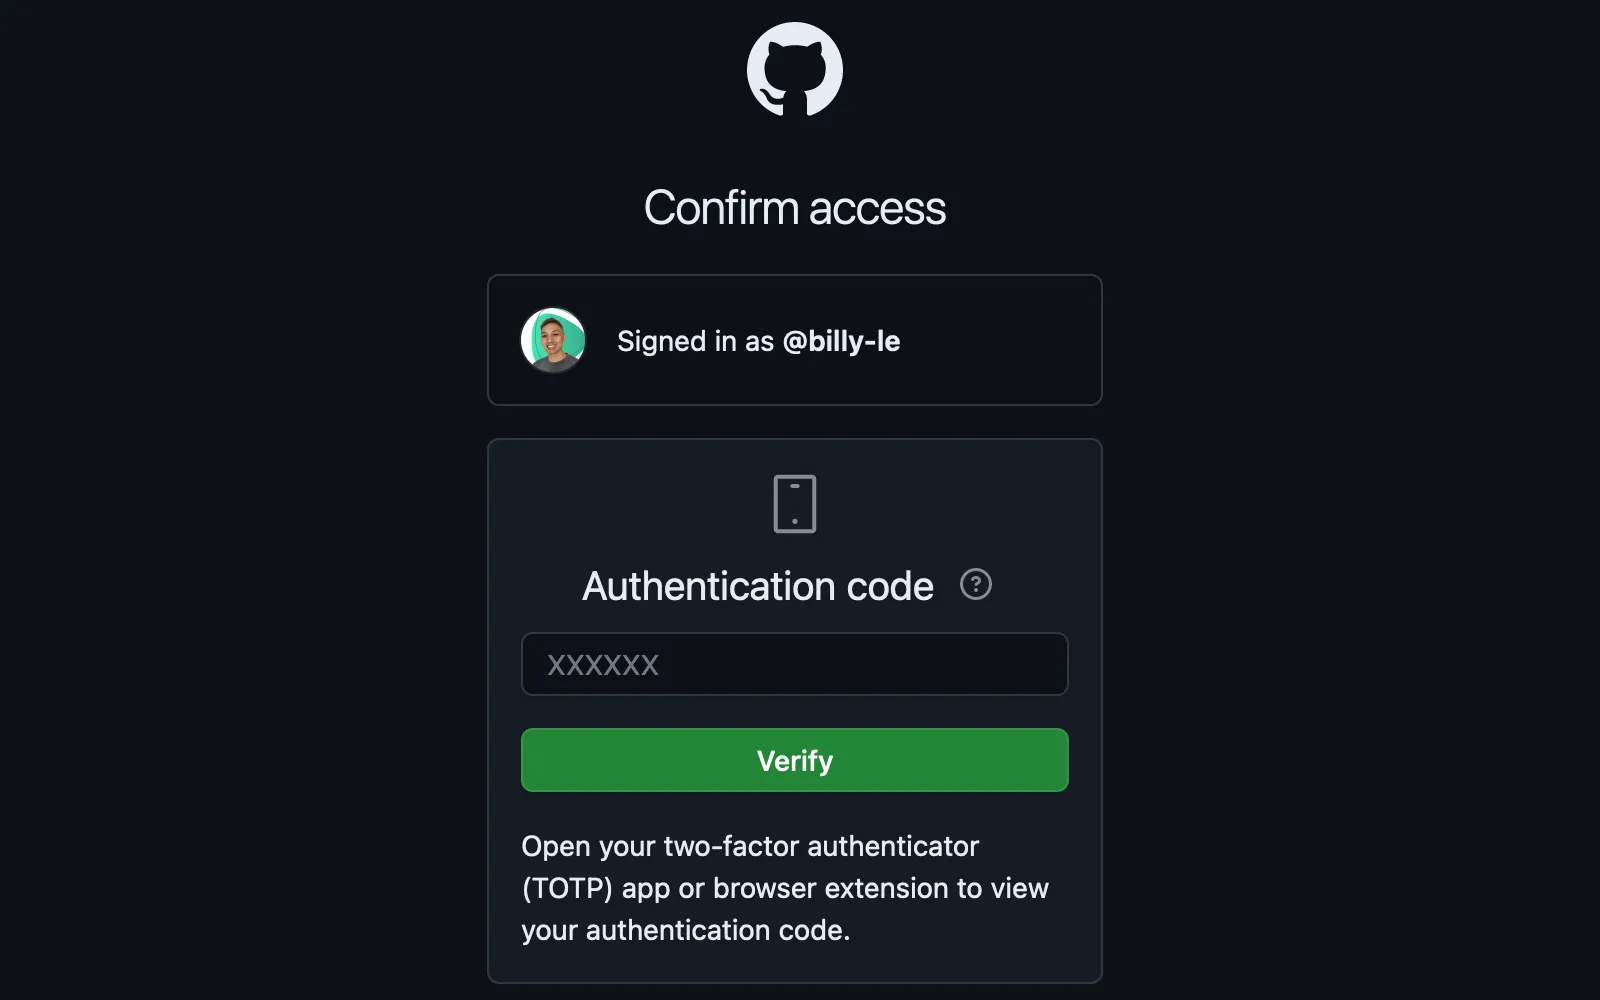
After you log in, you will see the GitHub App you’re about to create. The name should match the GitHub App name given in the Coolify instance.
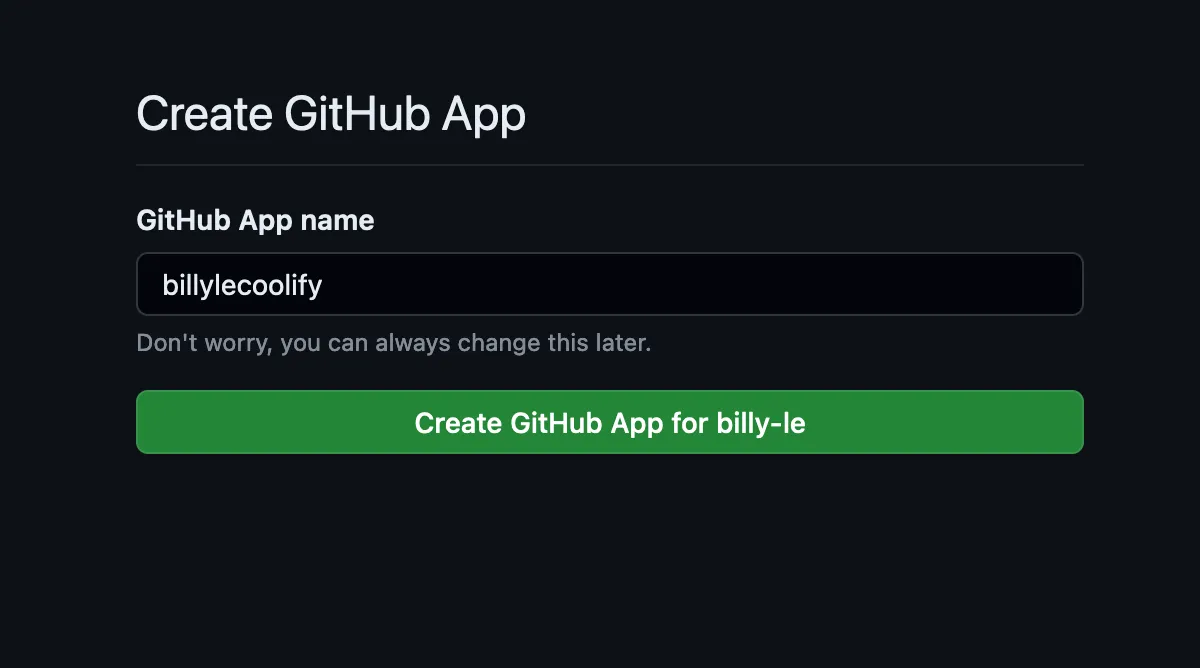
Click on “Create GitHub App” and you’ll be redirected back to Coolify.
You should see a screen now with a button that says “Install Repositories on GitHub”. We want to connect our GitHub App to our GitHub account so let’s click on that.

This next step will grant the GitHub App that you created (mine was named “billylecoolify”) to have access to your GitHub repositories. You can select specific repositories or all repositories. I think keeping it on “All repositories” makes it easier, so you don’t need to manually keep adding repositories later.
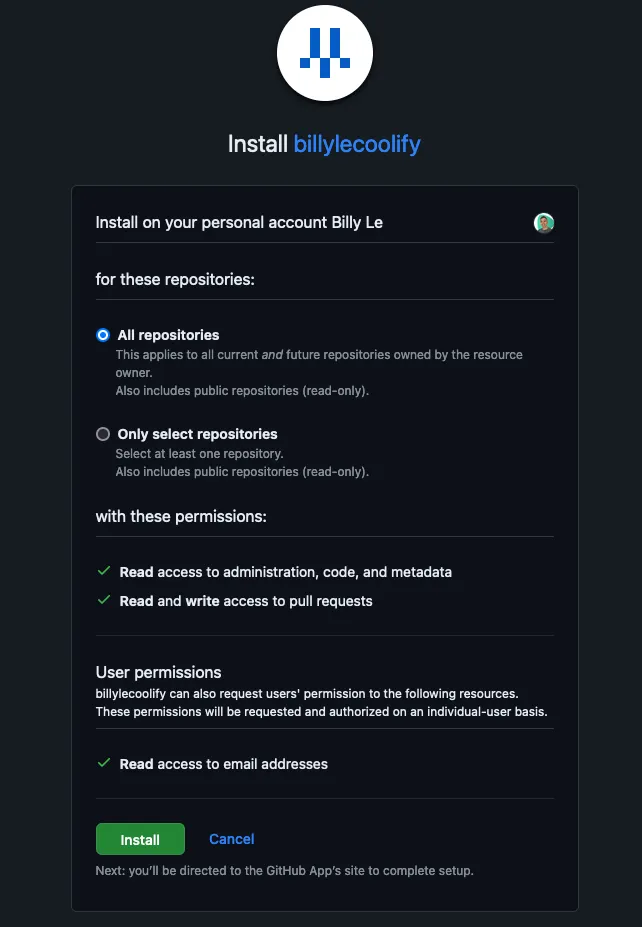
Notice all the permissions the GitHub App is requesting.
- Read access to administration, code, and metadata
- Read and write access to pull requests
The write access here is for Coolify to create comments on your Pull Requests which I will show you later. Click on “Install” and it will redirect you back to Coolify.
The Coolify GitHub App Source was auto populated and has all the necessary information for it to trigger builds on your behalf.
We’re going to create a new project in the next section and test the Pull Request Preview Deployment feature.
Add a new Project with our new Source
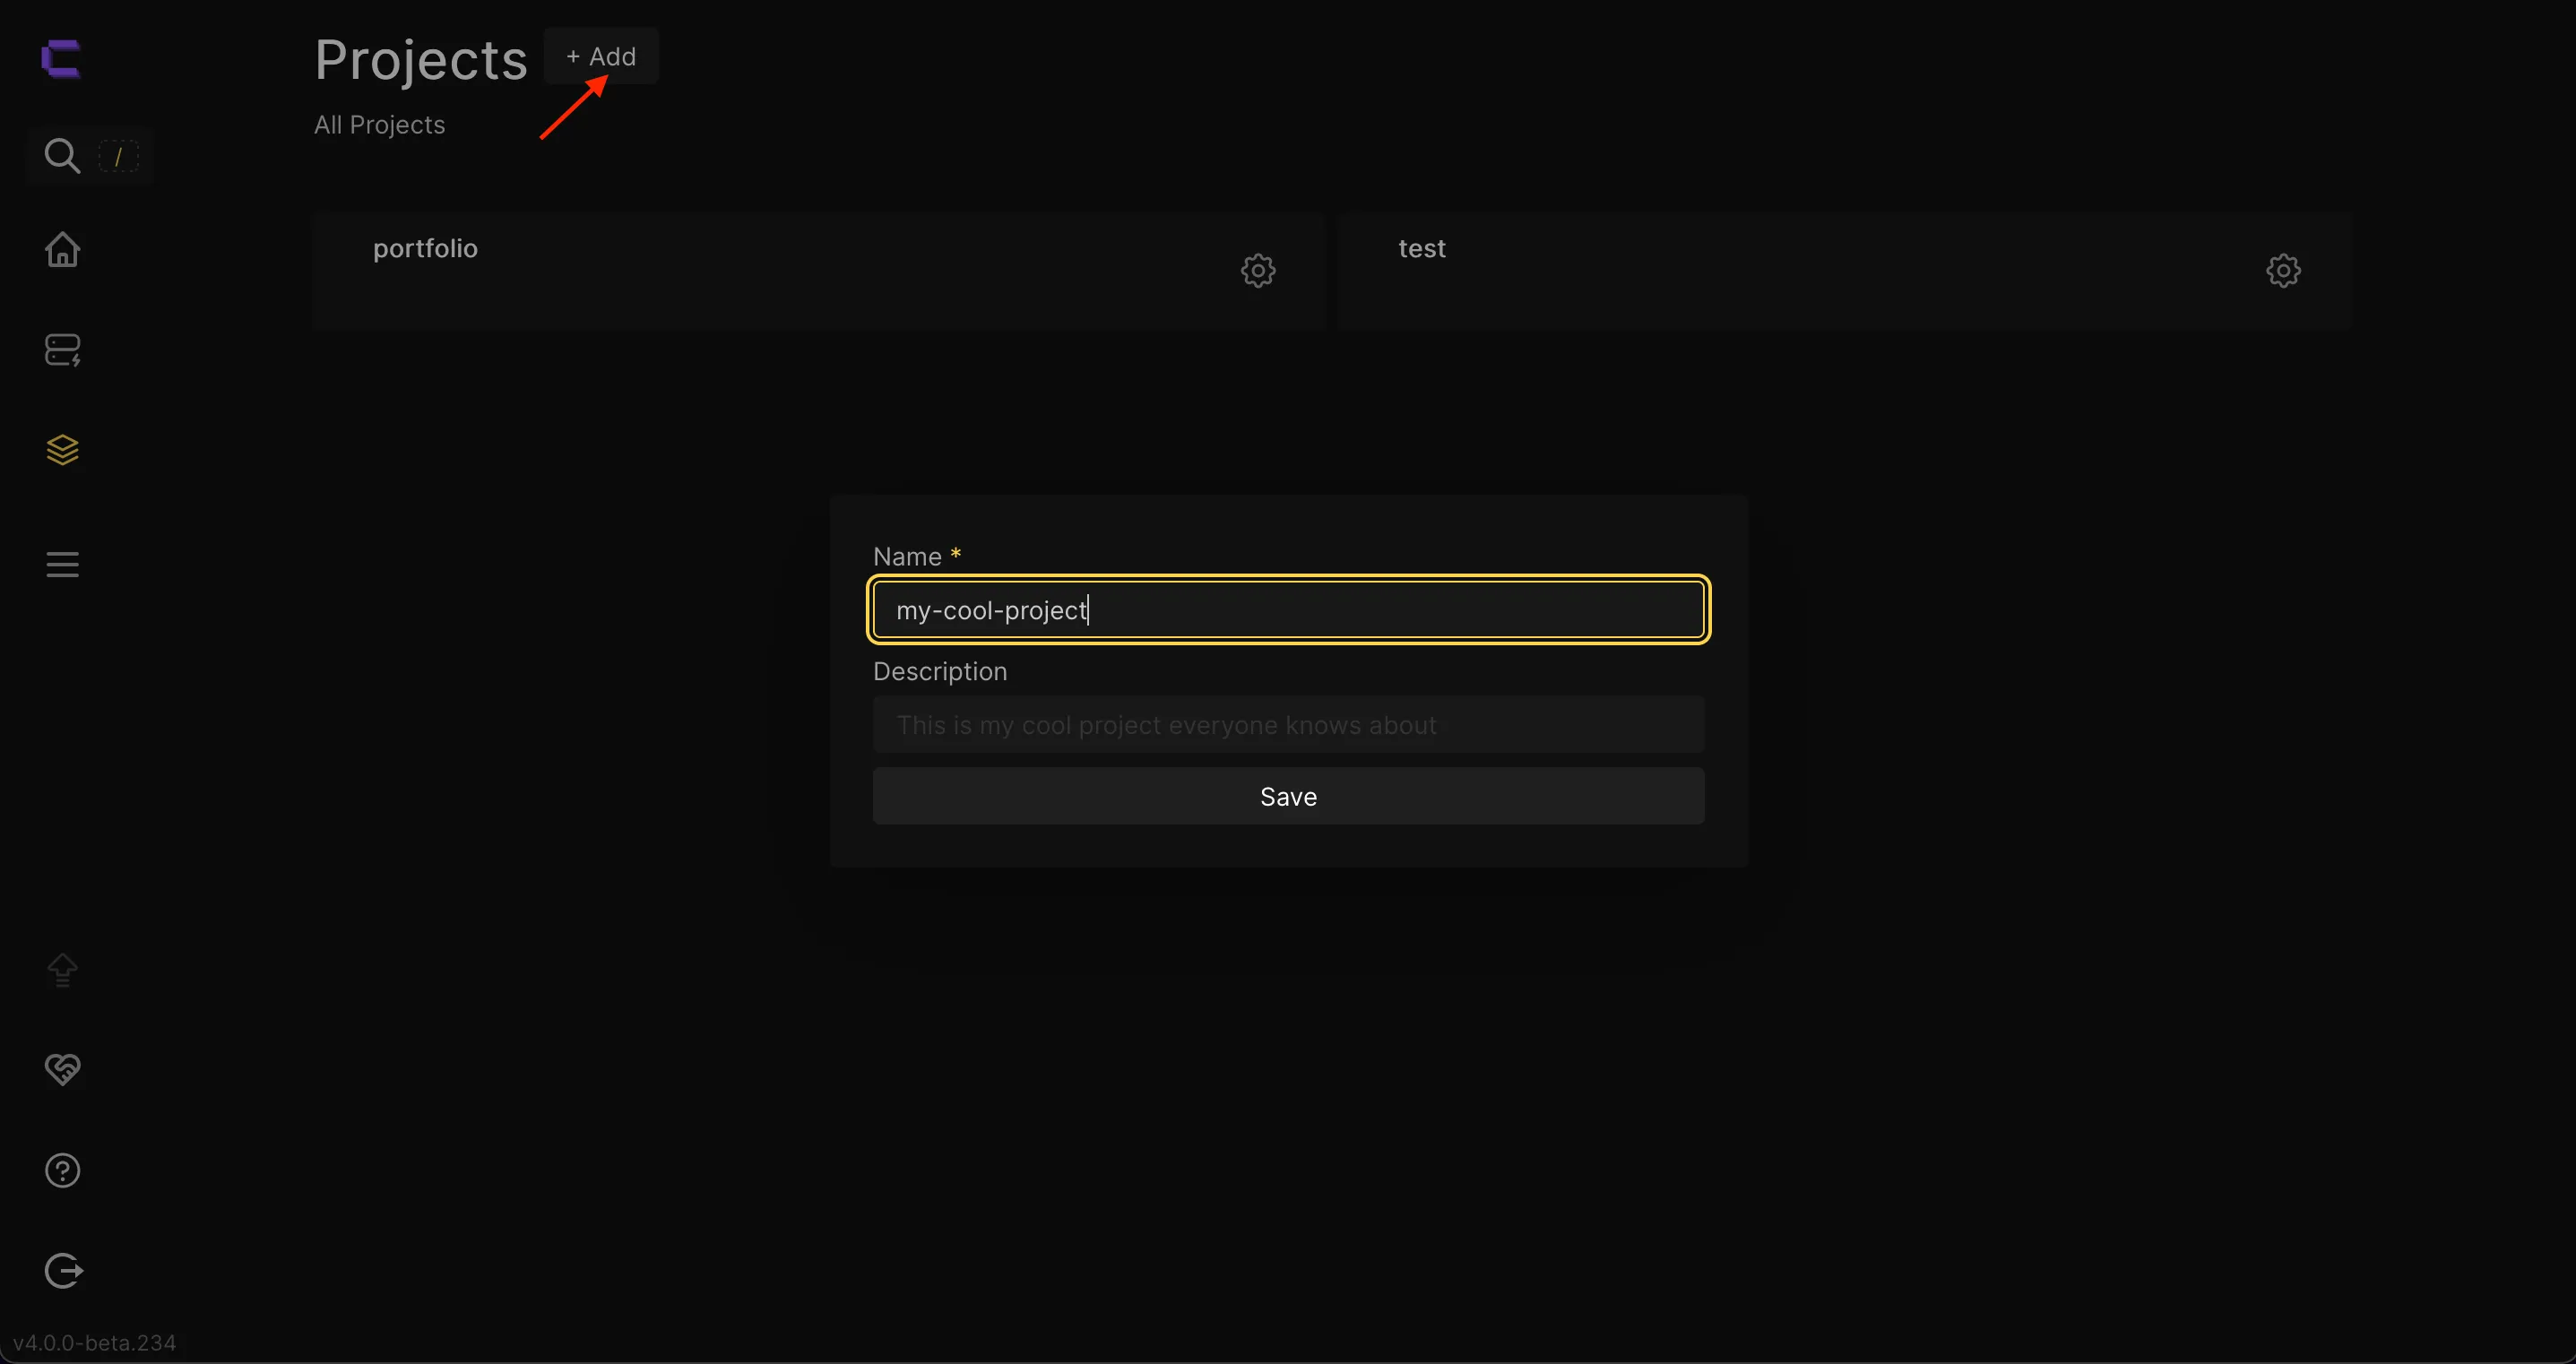
Head over to the Projects page in the navigation menu and create a new Project.
Give it whatever name you like. I’m going to name mine “my-cool-project” and click save.
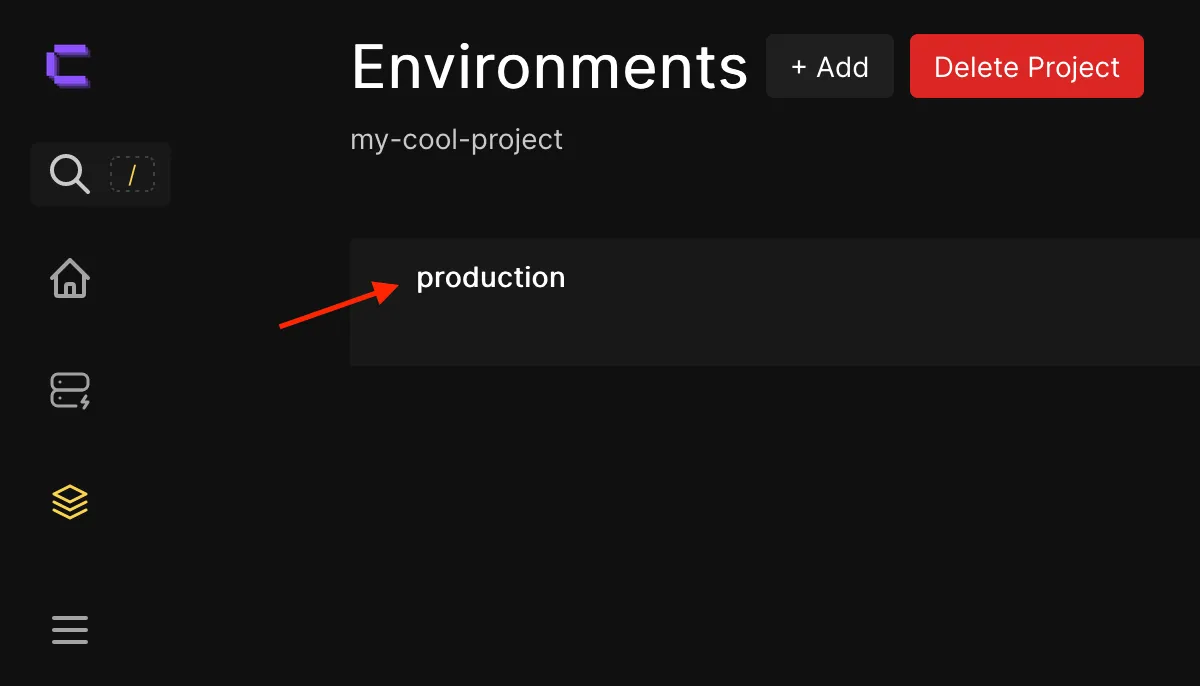
Select an environment on the next page. I only have one environment, “production”.
And then we’ll add a new Resource for our project.

You’ll see a page with many resources. Since we created a GitHub App, we’re going to choose the “Private Repository (with GitHub App)” option.

The next screens will ask you where to store your resources. Select “localhost” for your Server and “docker-standalone” for the Destination.


Now it will ask you which GitHub App you want to use. We’re going to select the one we created.
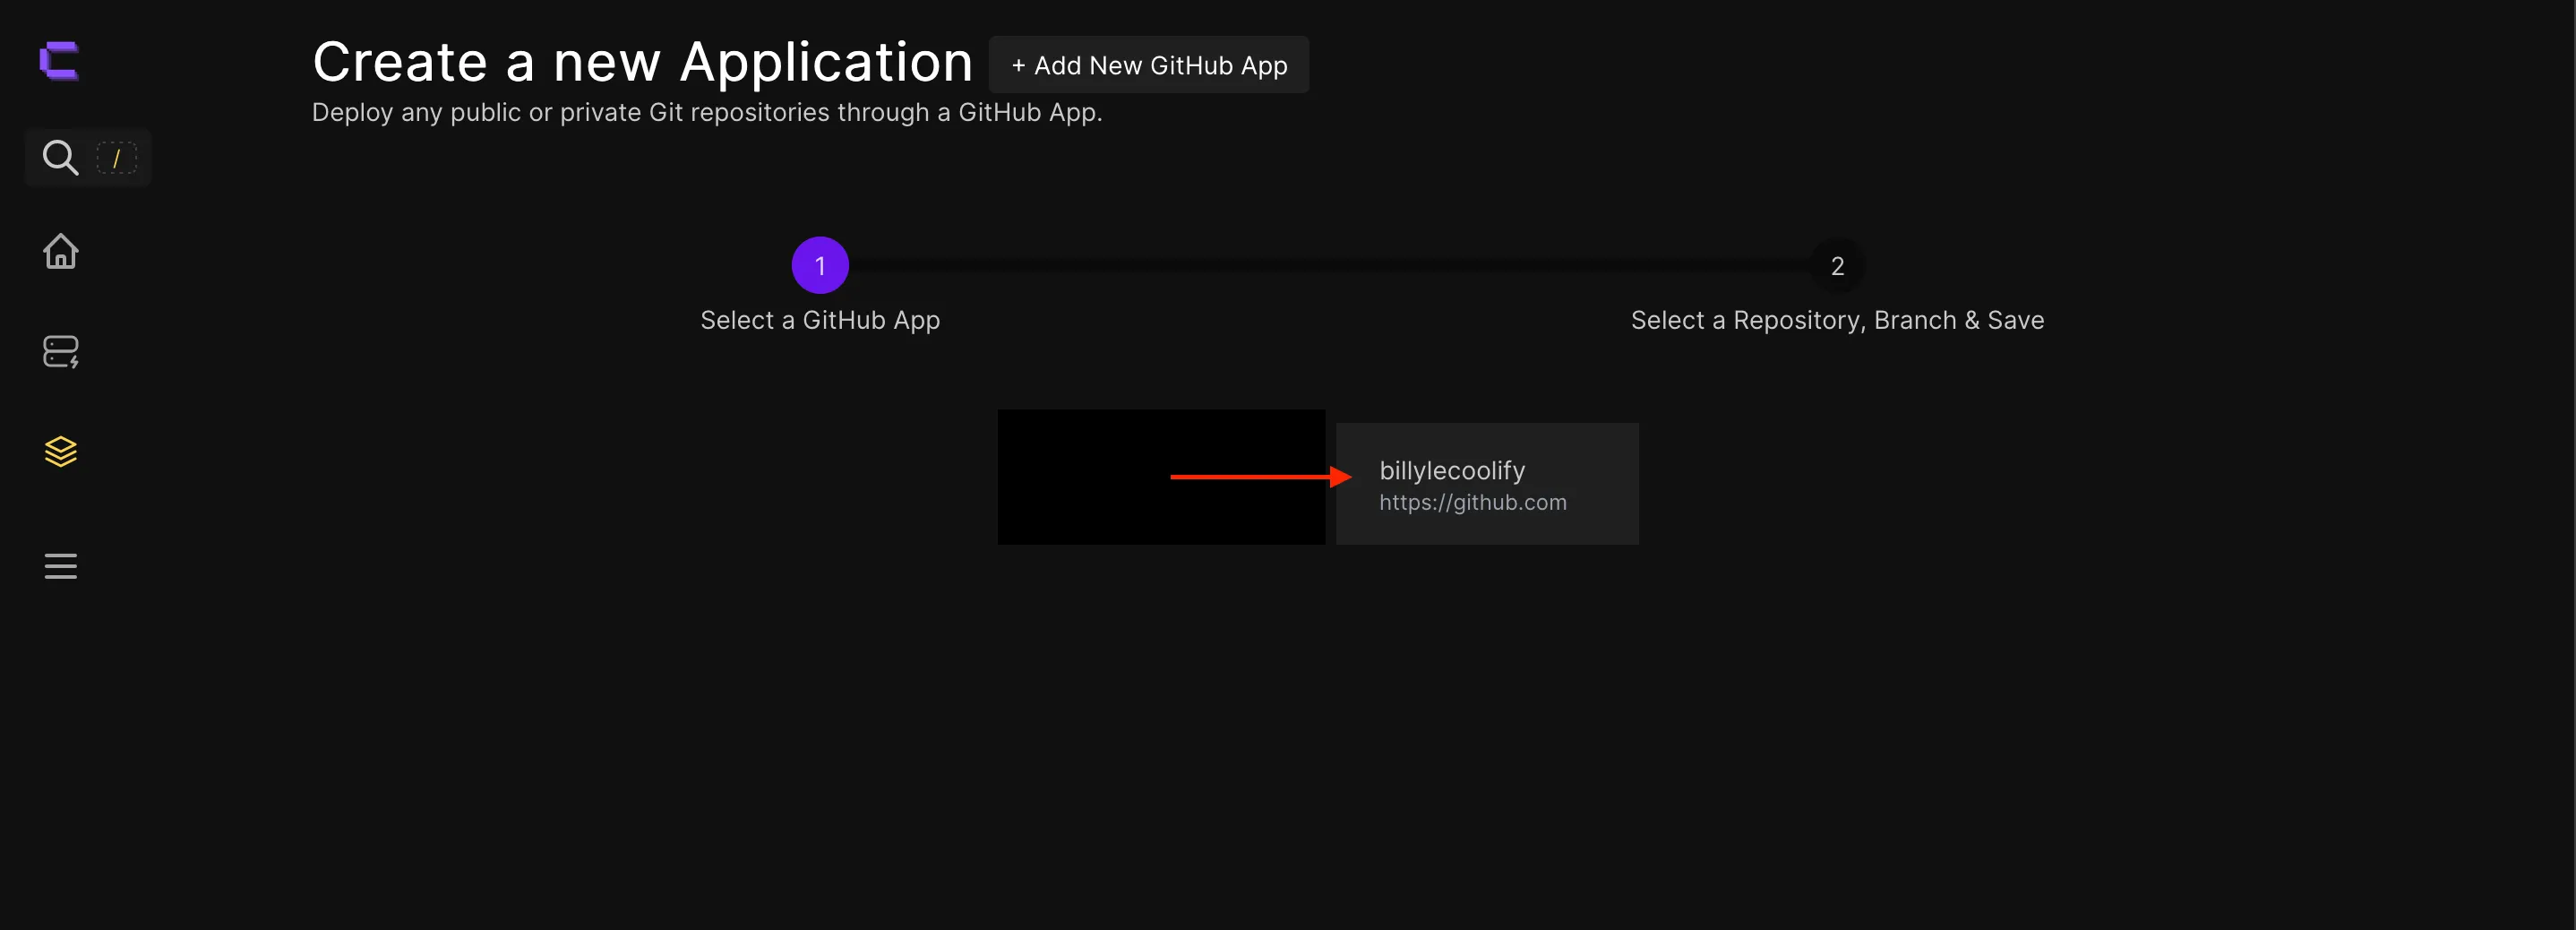
We can see all our repositories and choose the one we want to deploy! How awesome is that? I’m going to select an old project that runs on a node server for this tutorial.
From the dropdown list, select the project you want to deploy.
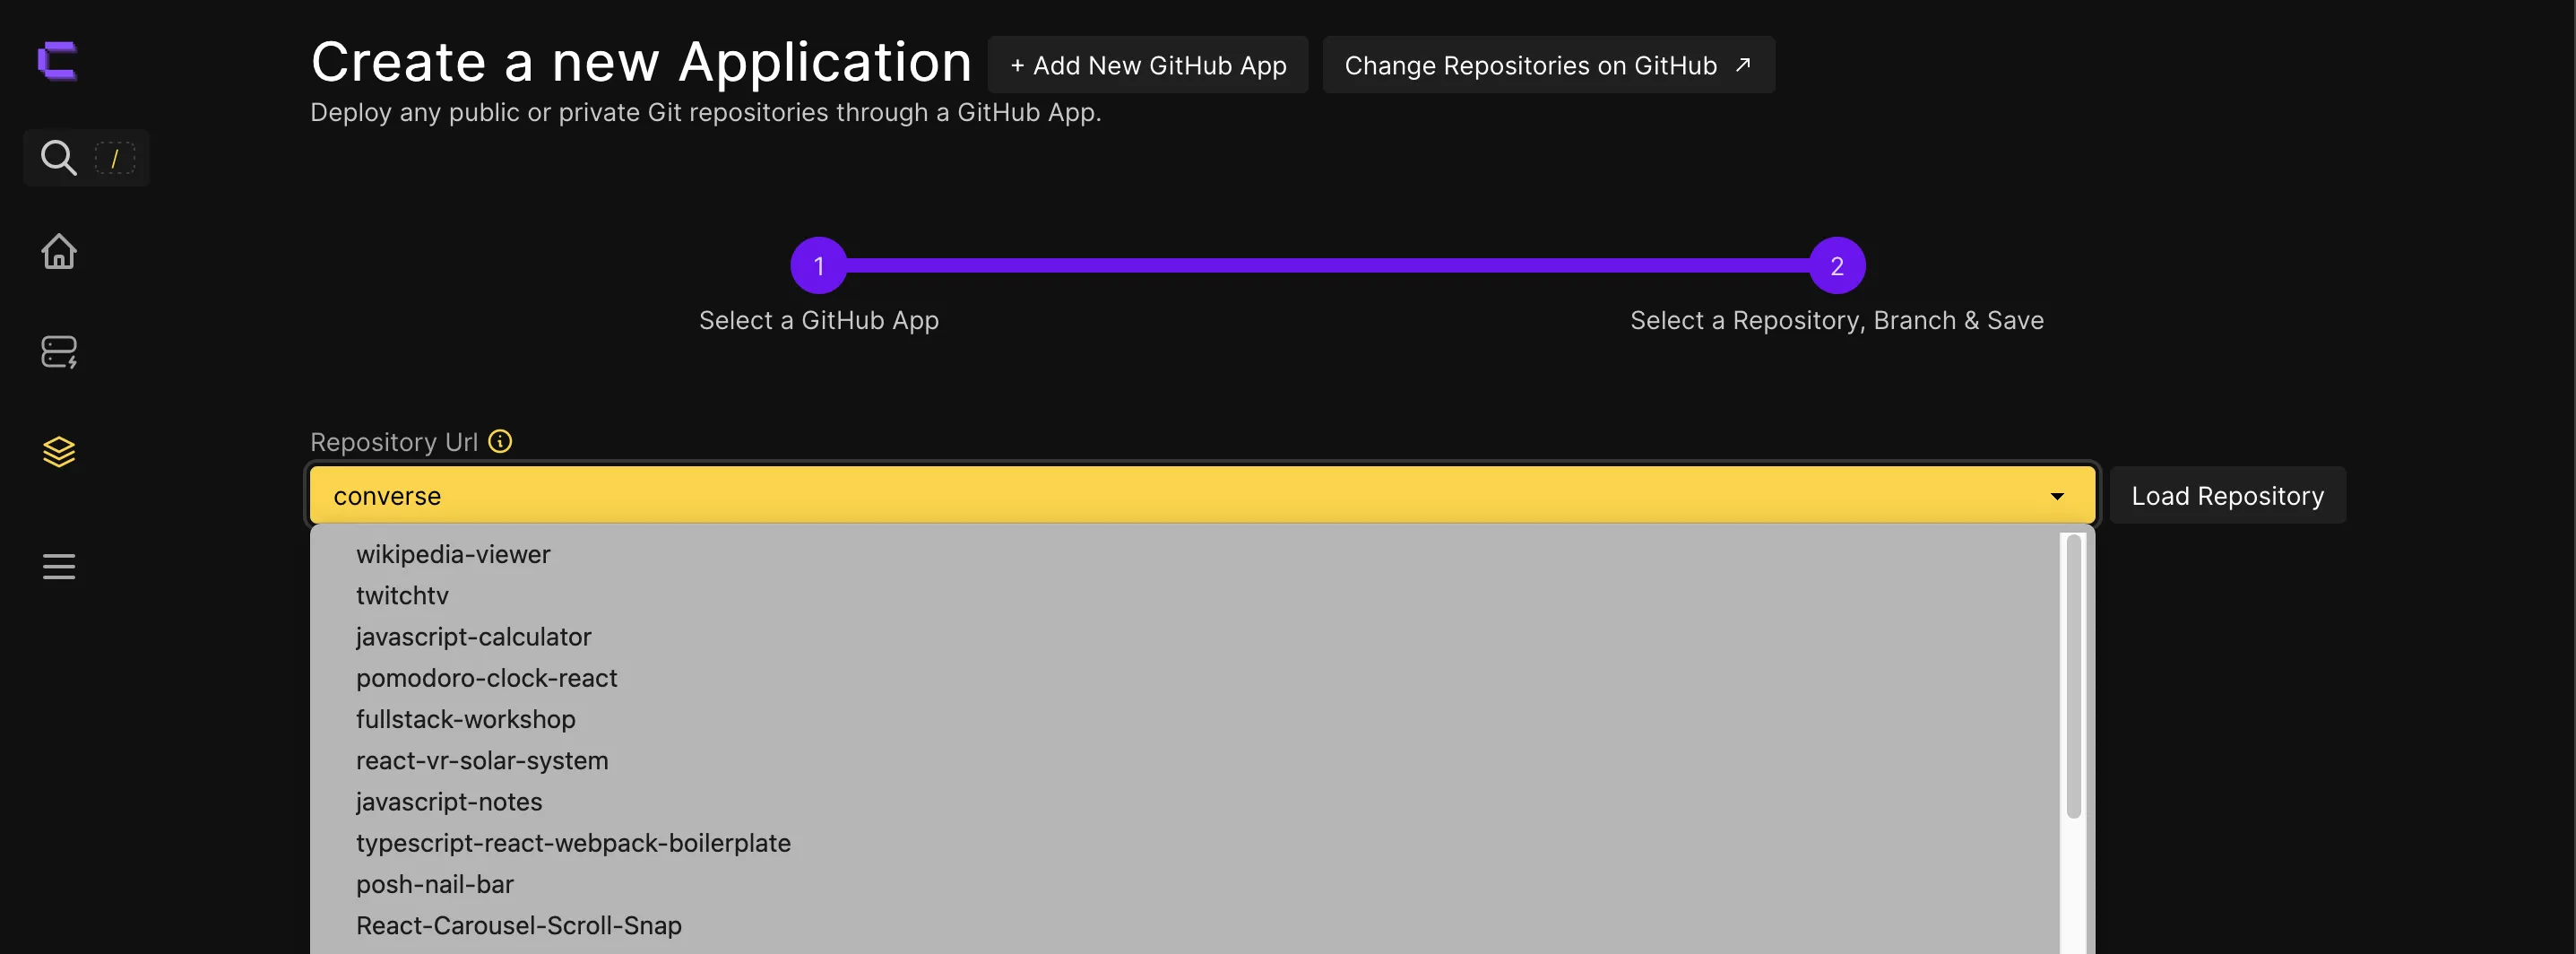
Once you select your repository, click on “Load Repository”.
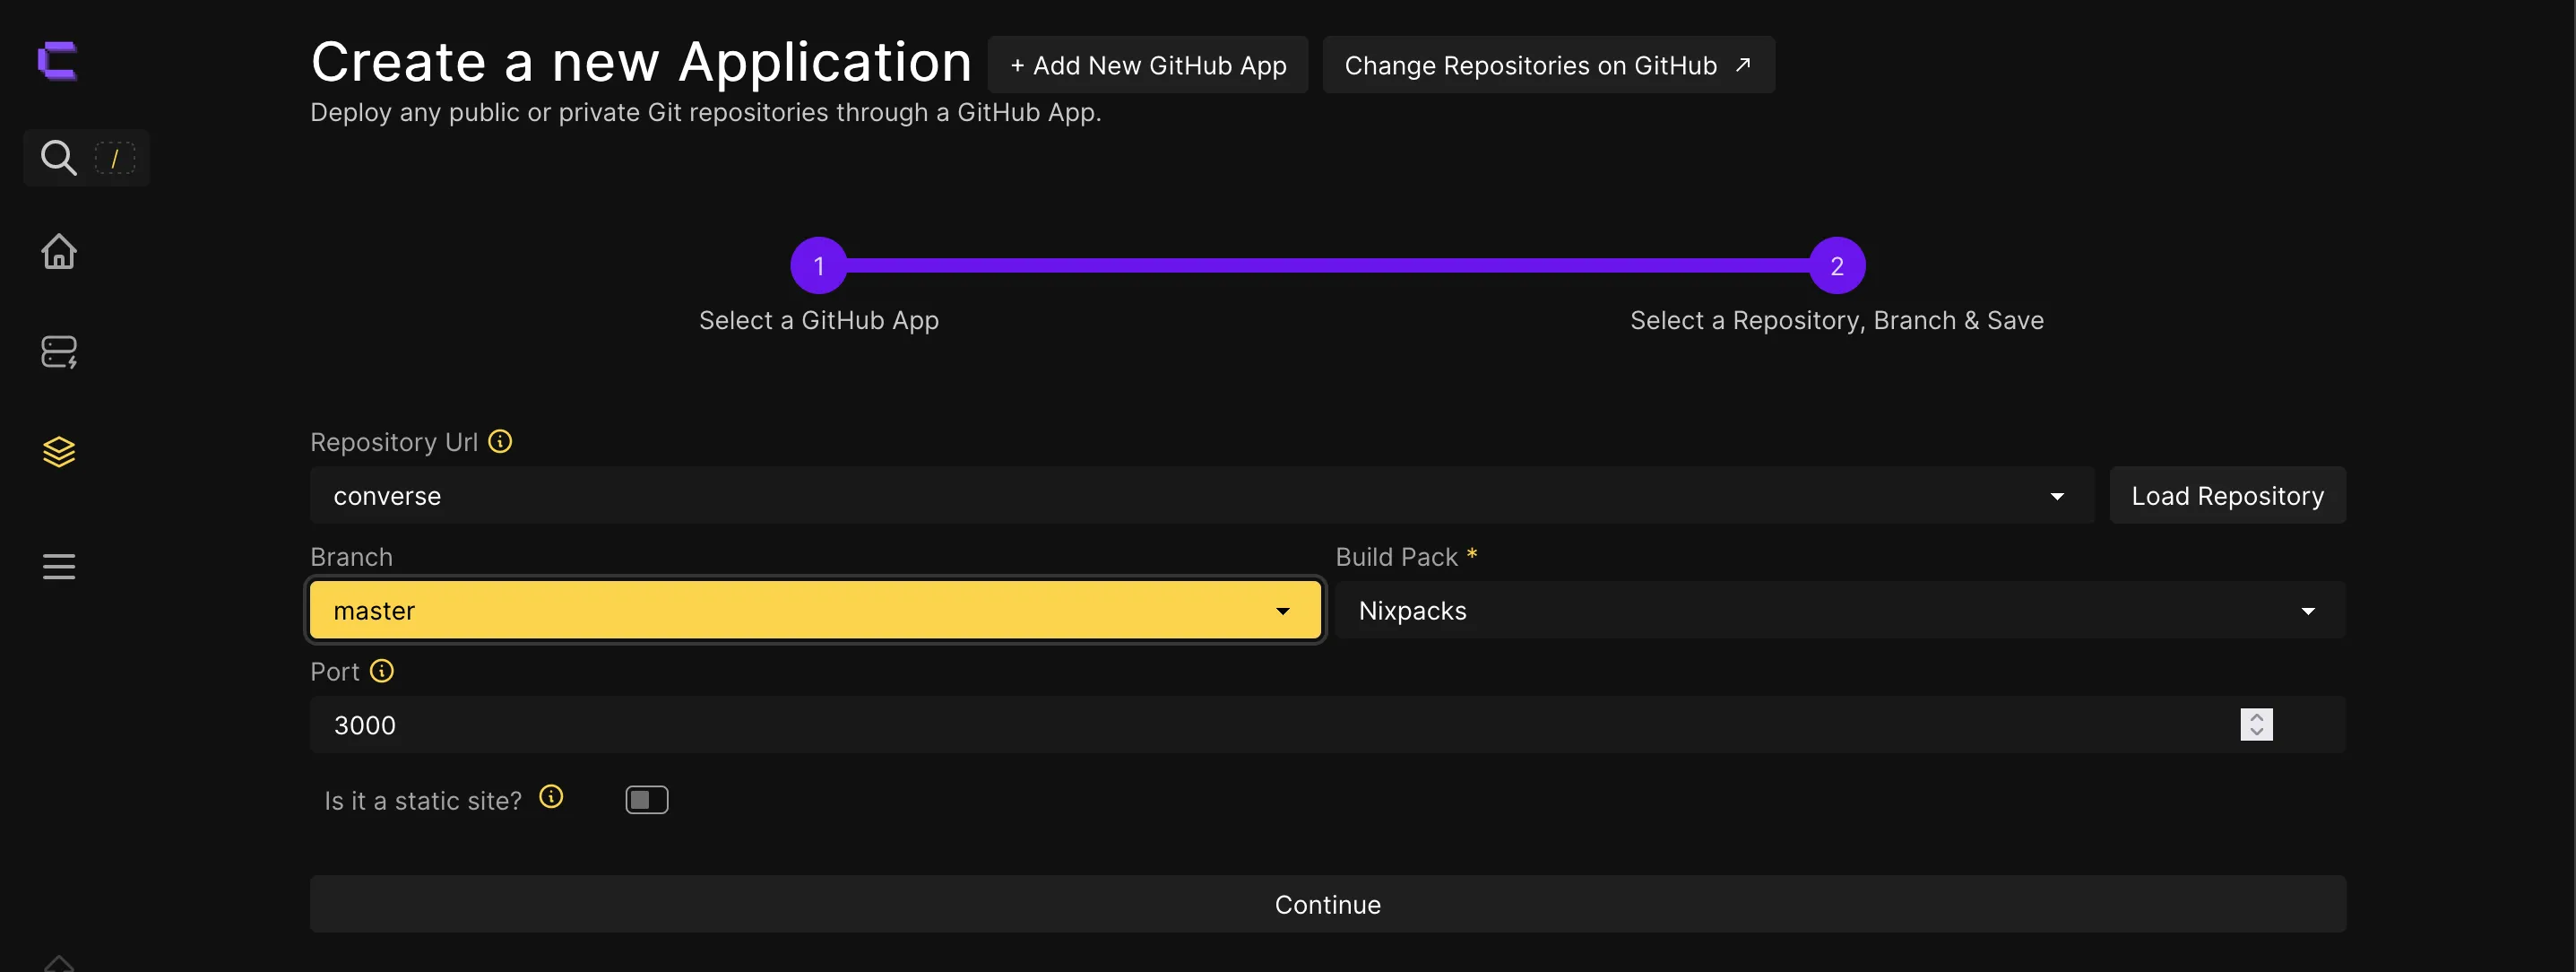
Coolify will try its best to gather information about your project like the main branch we want to deploy, the build pack, and the port.
I had to adjust the Branch to “master” because the dropdown list is ordered alphabetically. If your site is static, be sure to toggle that on. You can change all of this on the configuration page if you mess up. Click “Continue”.
This next section should be familiar if you followed my other tutorial when I set up self-hosting for this website.
Configuring for Preview Deployments
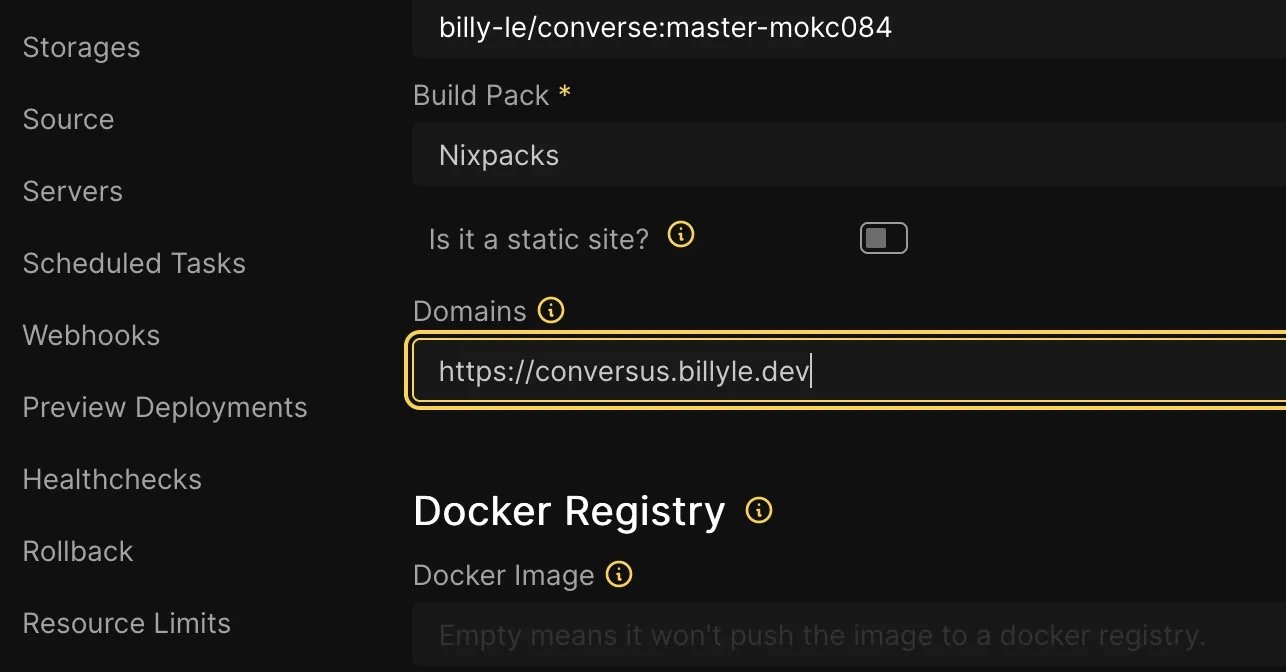
Notice how in the “Domains” field, we see the Coolify wildcard domain being auto-generated with the domain we gave it earlier in the “localhost” server configuration.
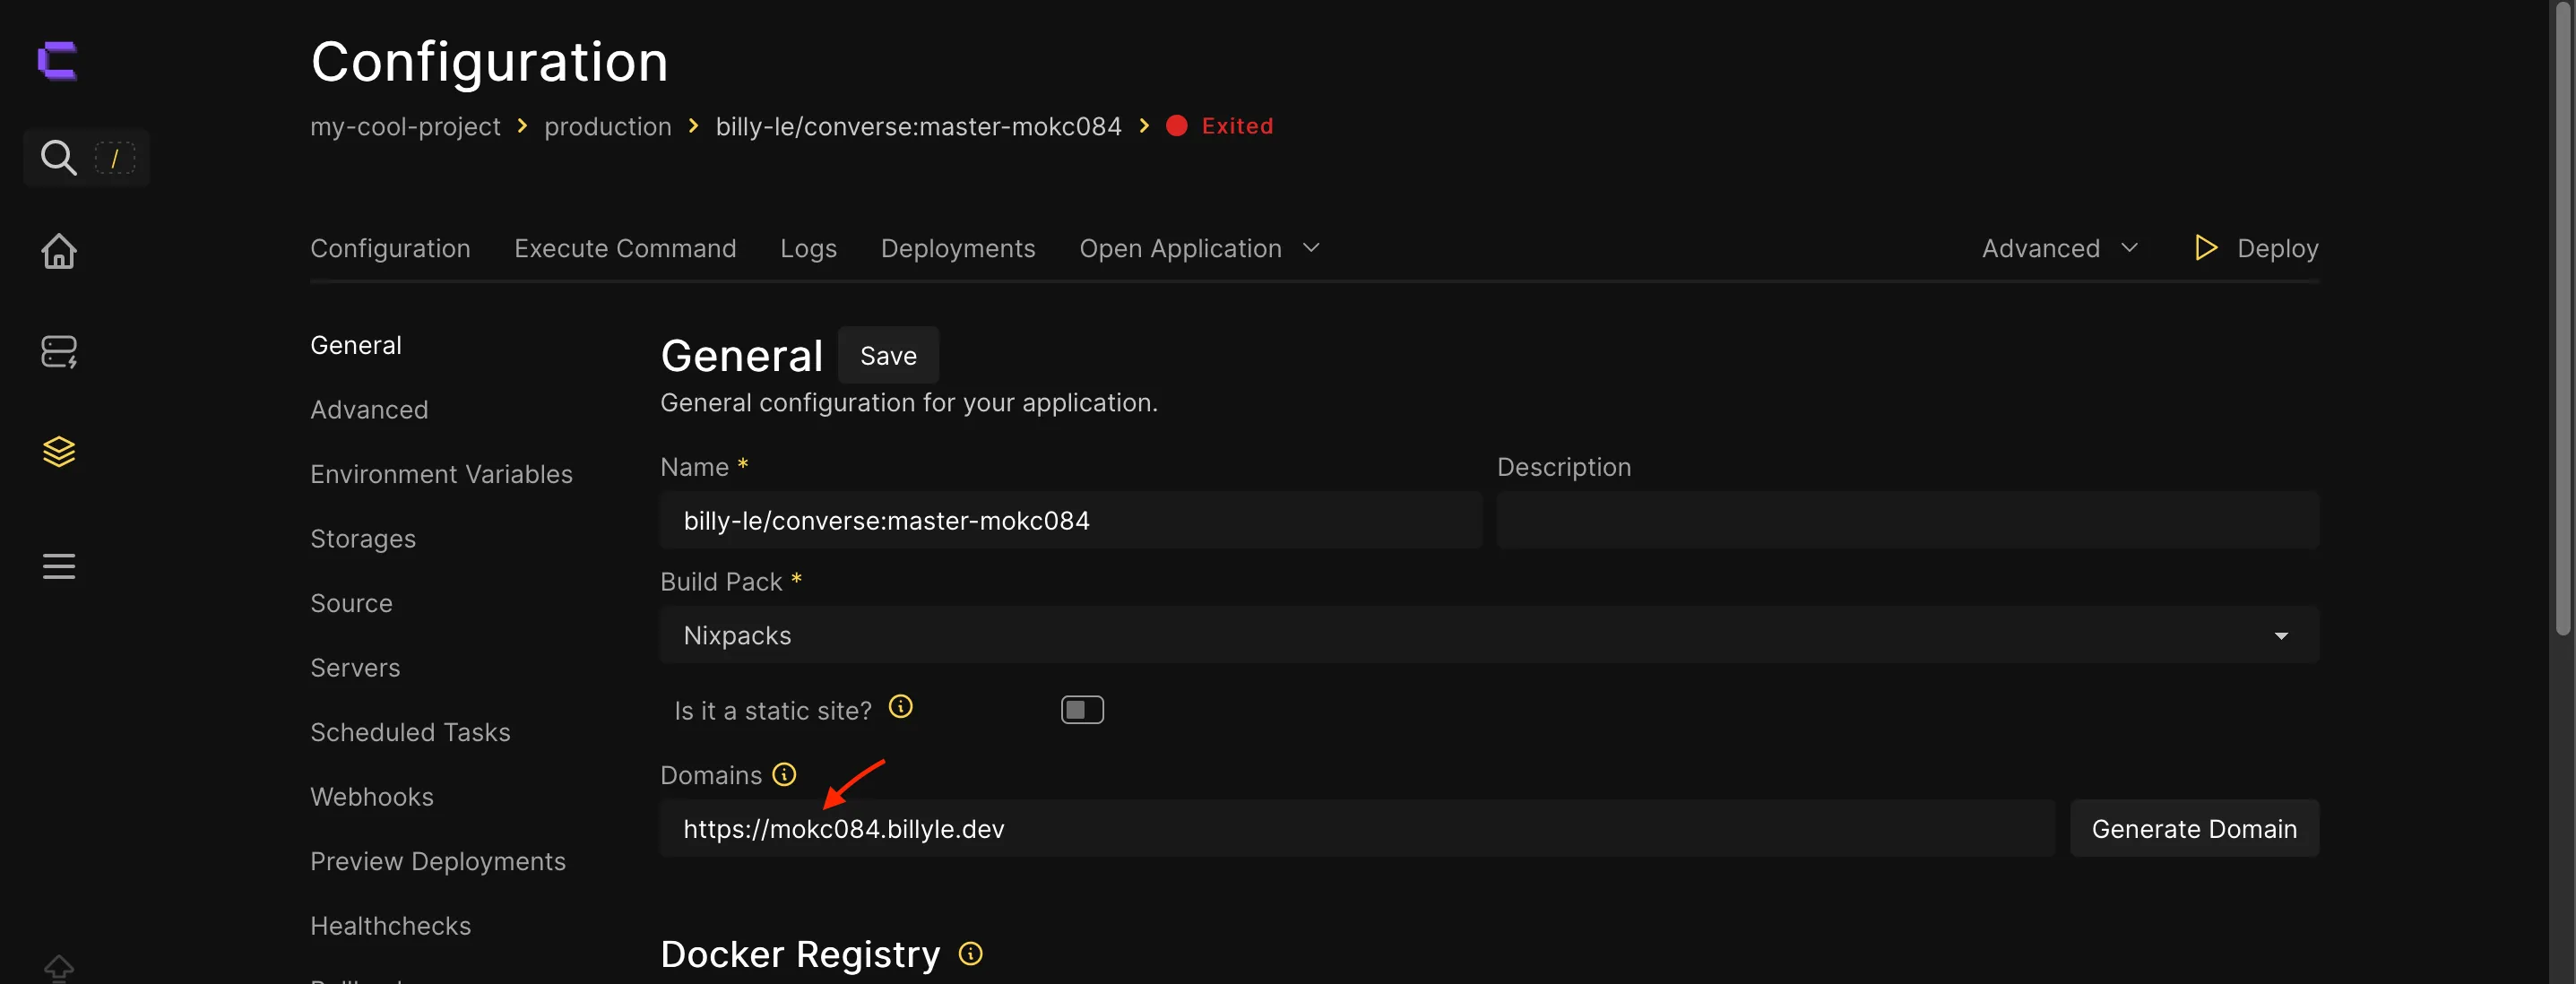
Change the subdomain portion to whatever name you like. I used the name “conversus”. Click “Save” next to the General heading.
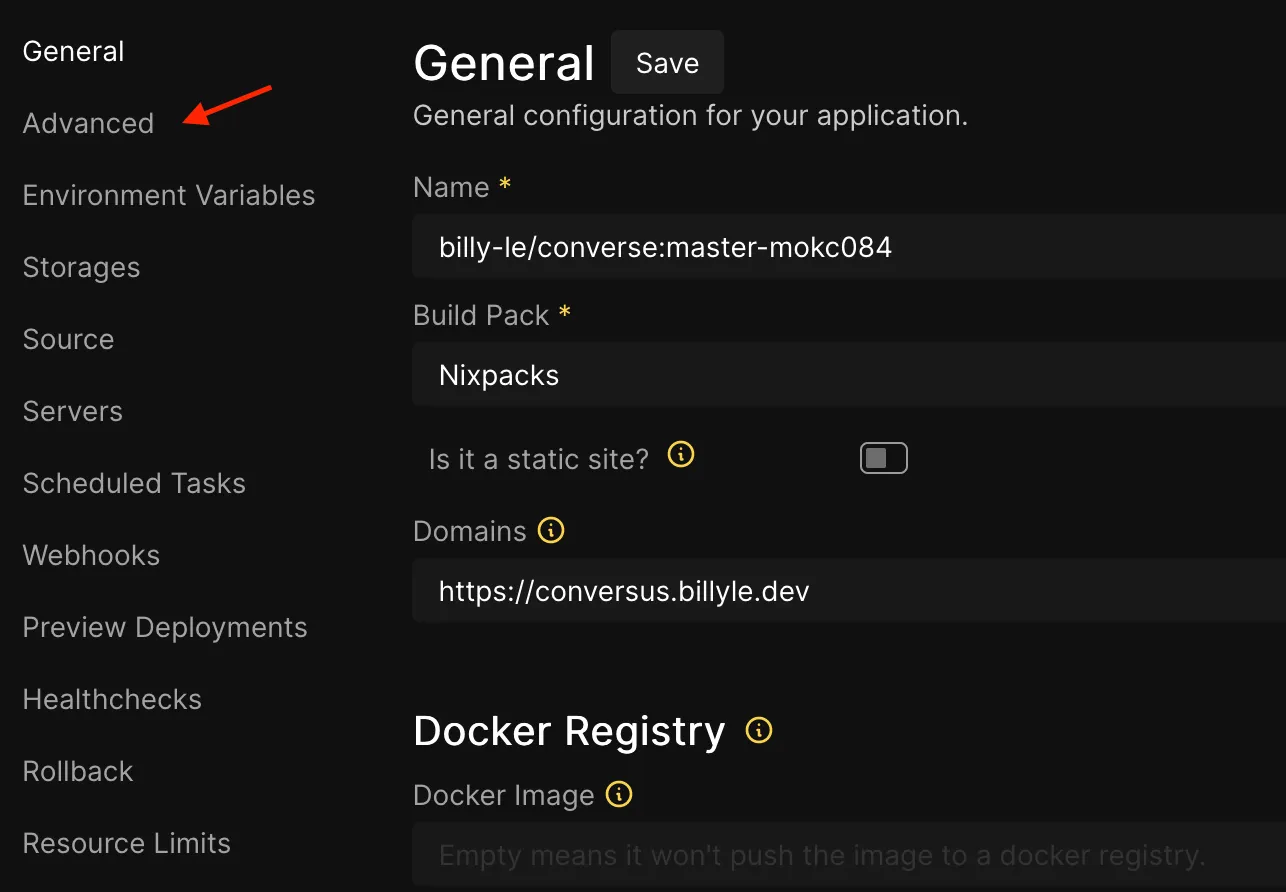
Now click on the “Advanced” menu item where we will turn on Preview Deployments for this application.
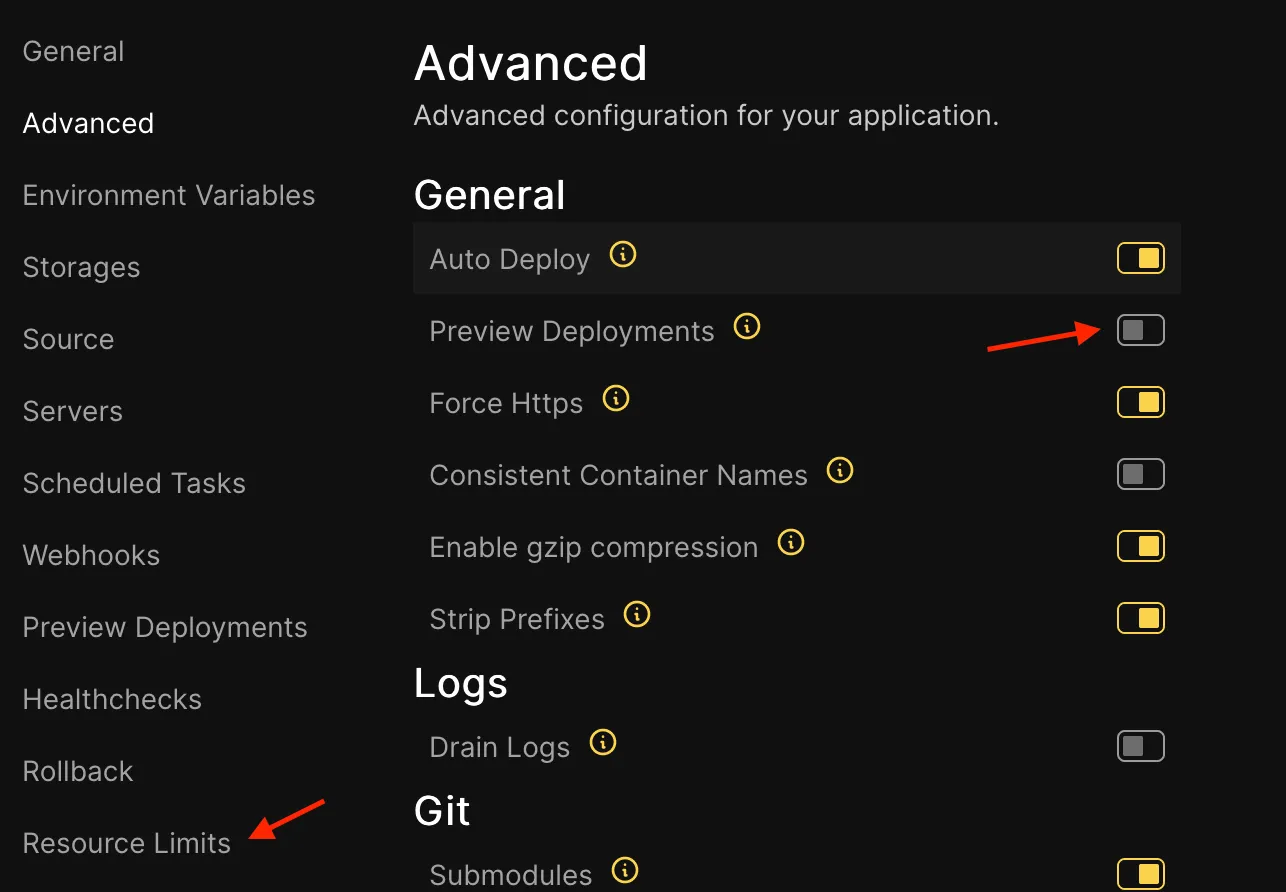
Toggle on “Preview Deployments”.
These next steps can be ignored if you don’t want to set resource limits for your application. In my case, since this application is a demo, I don’t want it to hog resources in case there are a lot of requests coming from it. Click on “Resource Limits” if you want this feature.
Limit resources for your app (optional)
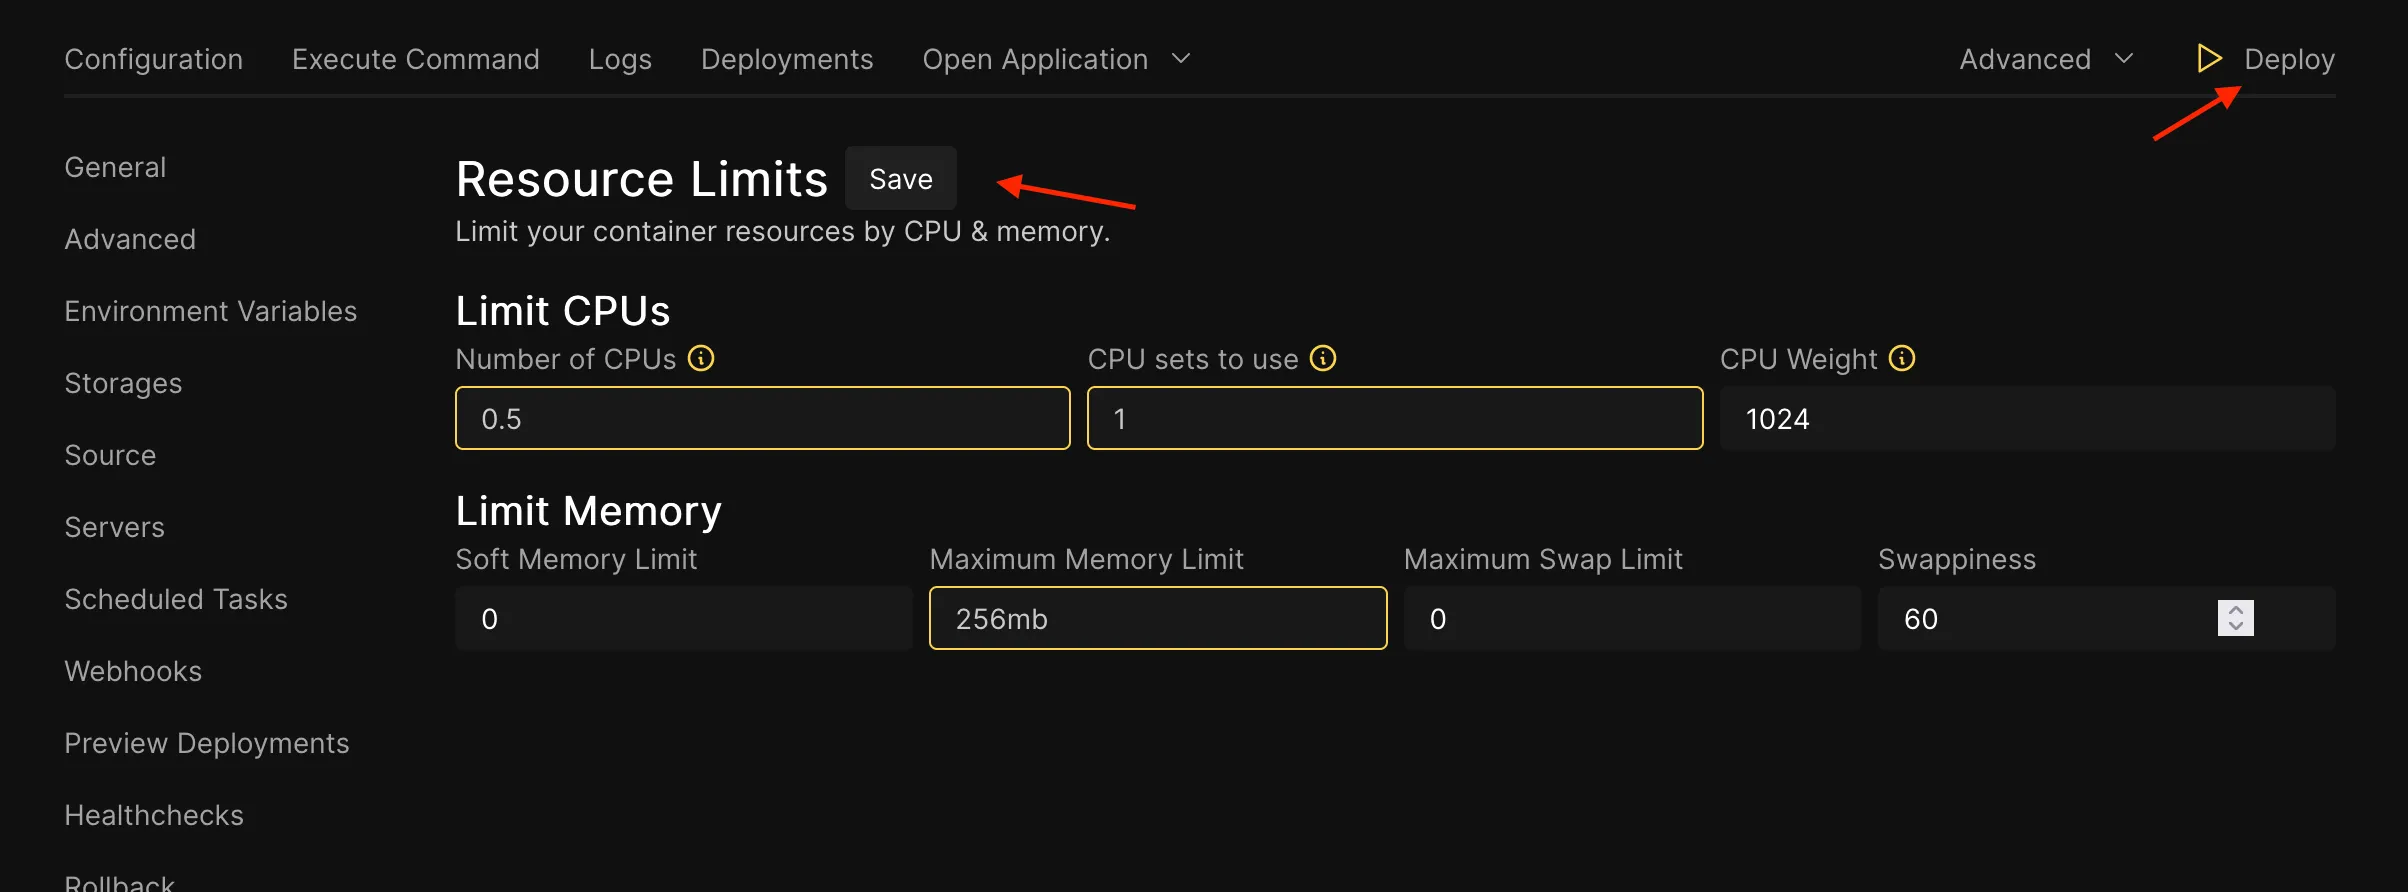
Under the “Resource Limits” menu, we will find several fields we can set to limit resources for the application. You can follow the link when you hover the asterisk in the field label to get more information.
Here I’m adjusting the “Number of CPUs”, “CPU sets to use”, and “Maximum Memory Limit”. Click save to apply the changes.
Launching Preview Deployments
Okay, so we’re ready to deploy our application. Let’s give it a try and see if it builds. Click on the “Deploy” button on the top right in the previous picture.
You will be taken to the build logs and see real-time output from your build.
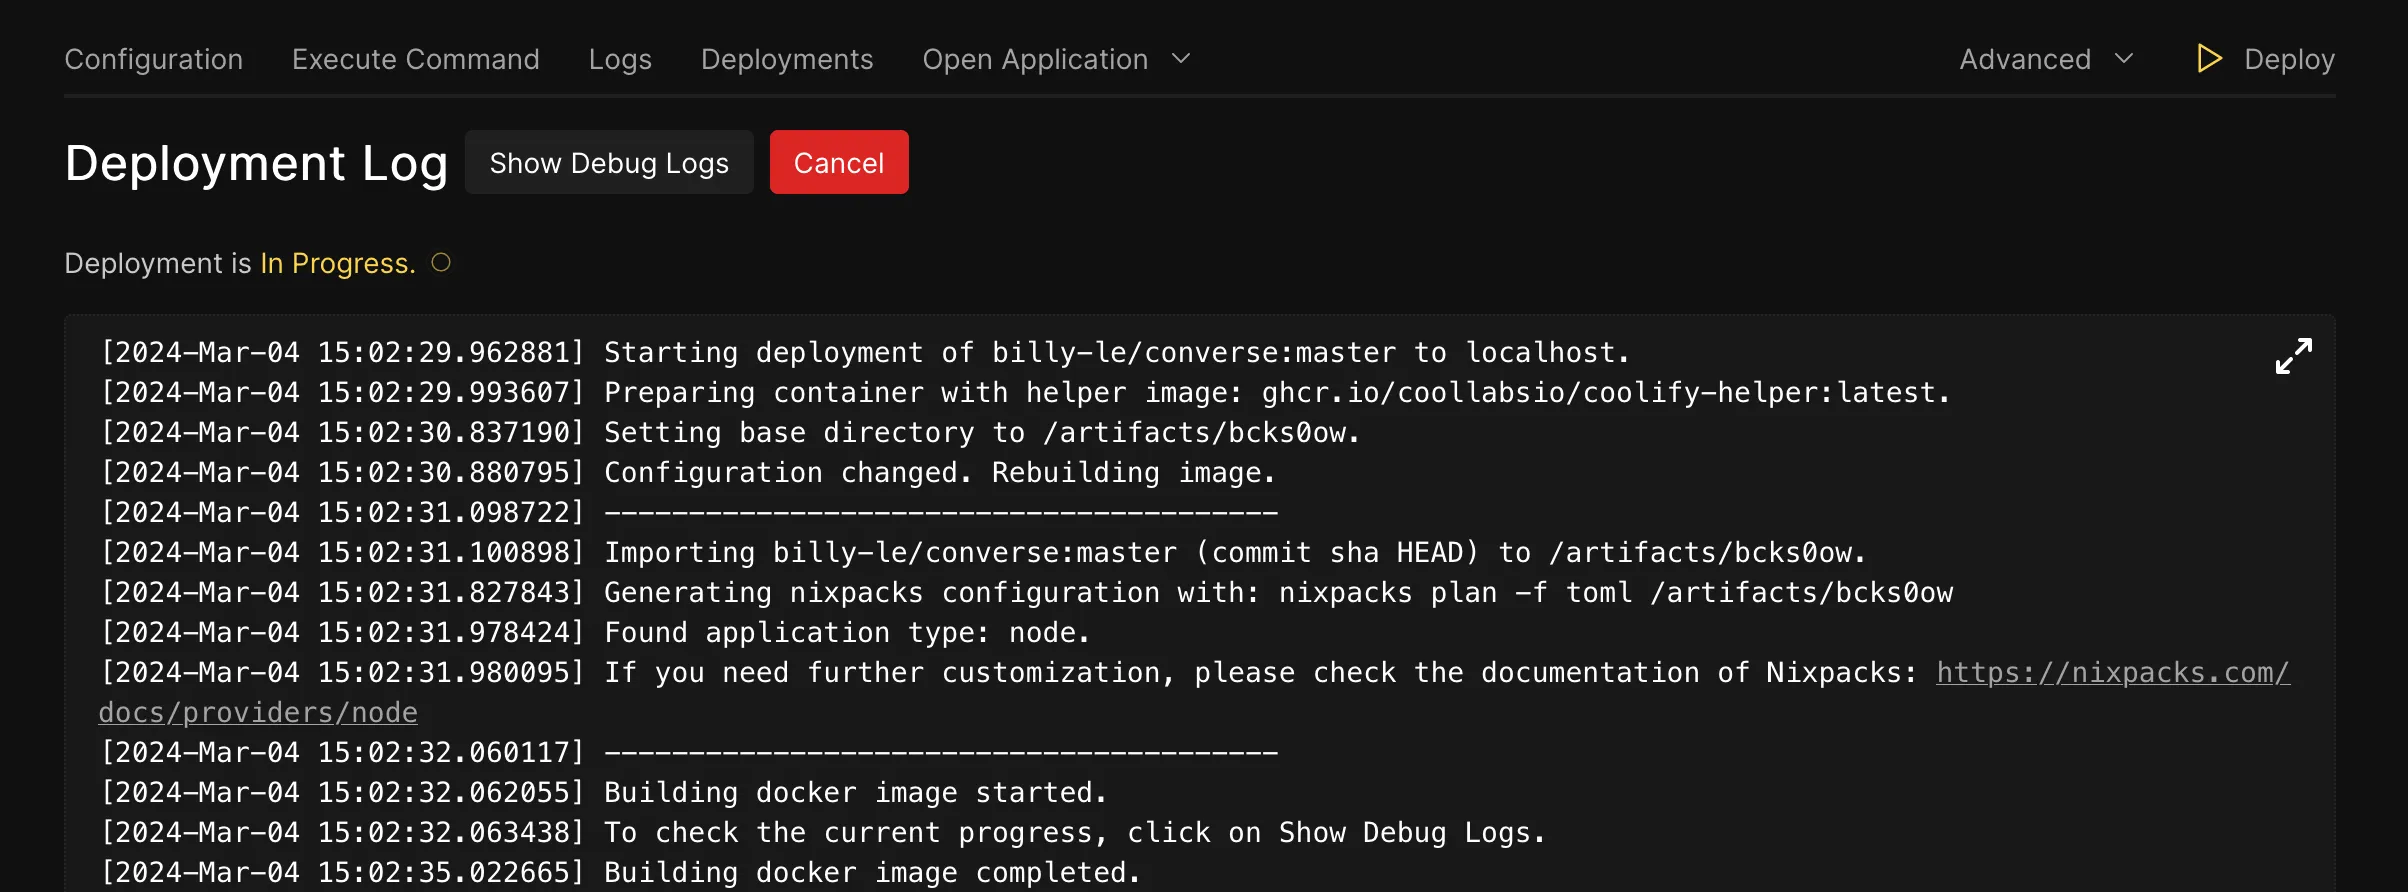
Once it’s complete, you should see that the Deployment status is changed from “In Progress” to “Finished”. Also, you will see a green “Running (healthy)” at the top. You can view your application by following the “Open Application Menu” and click the link.
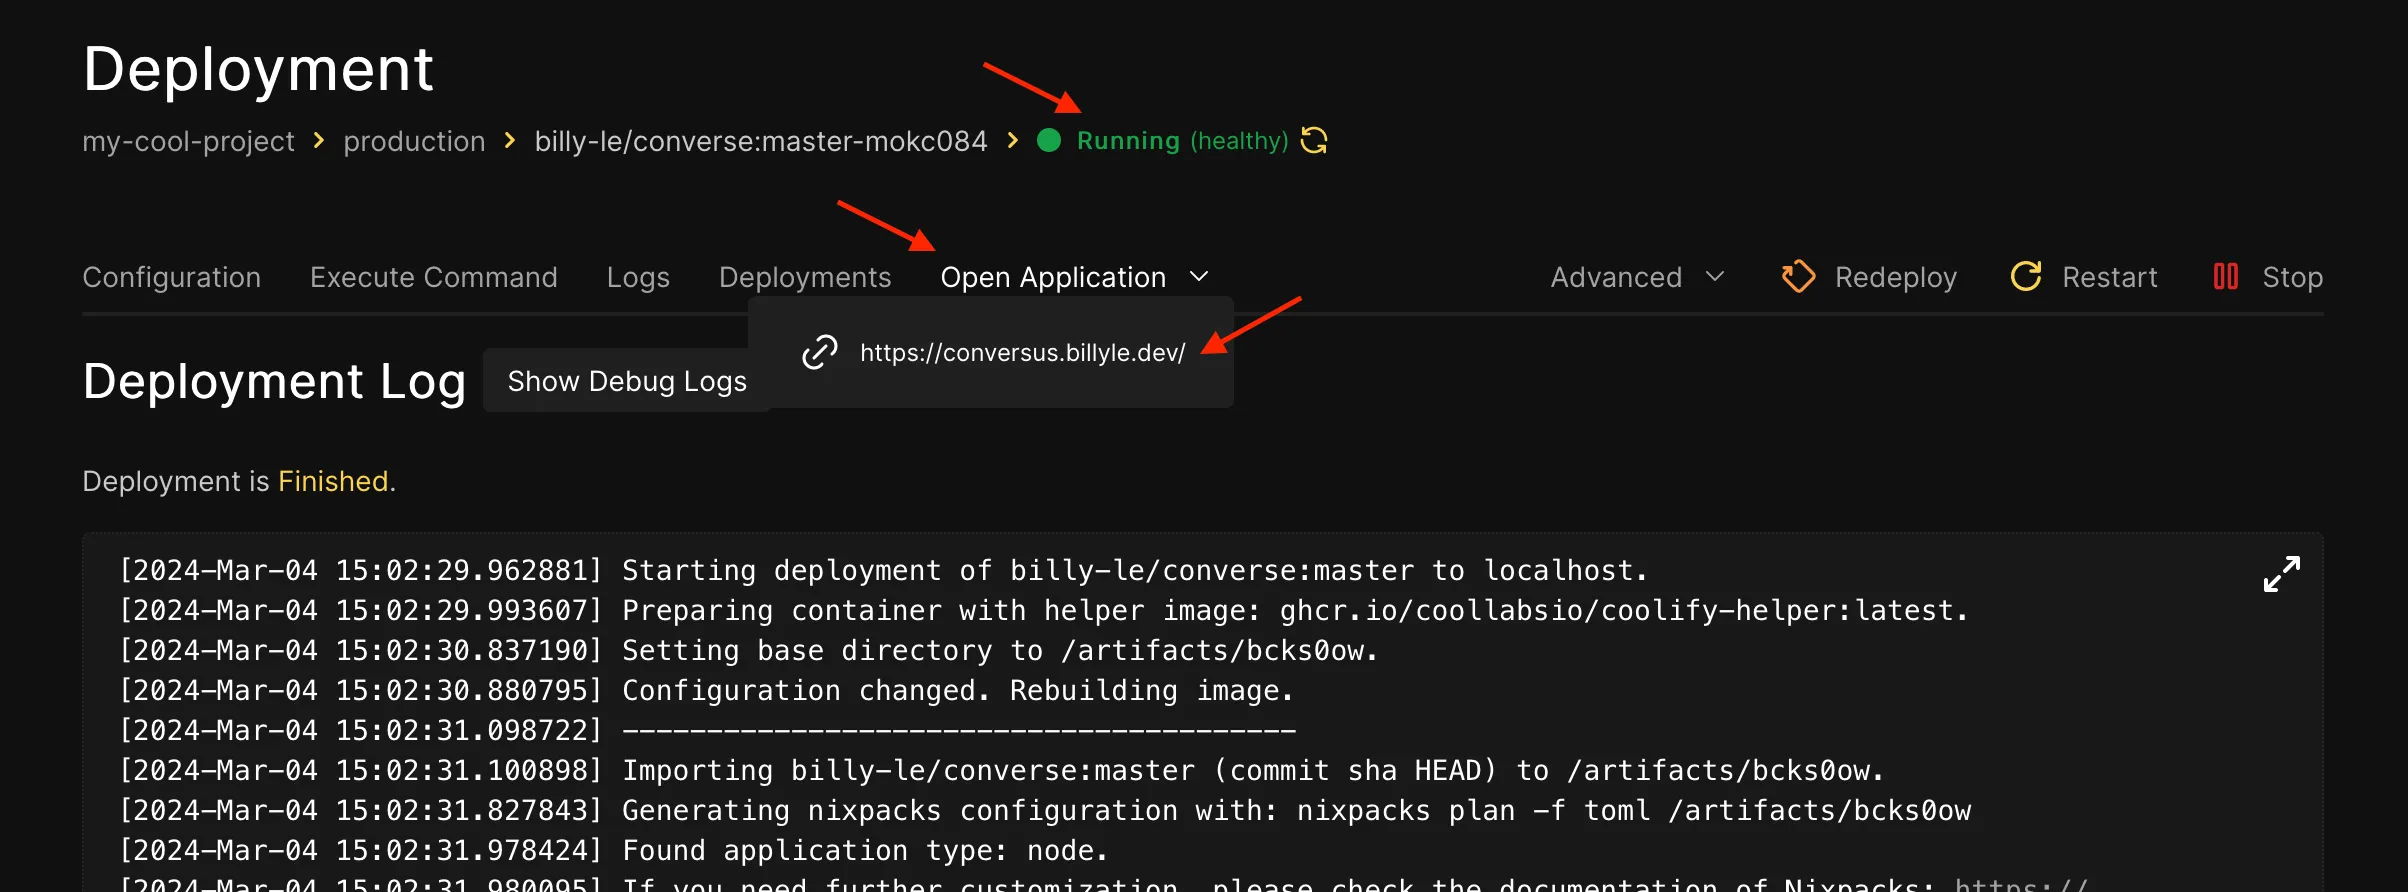
If it doesn’t work because of SSL, give it a few minutes and refresh the page.
This is how my app looks when everything goes well.
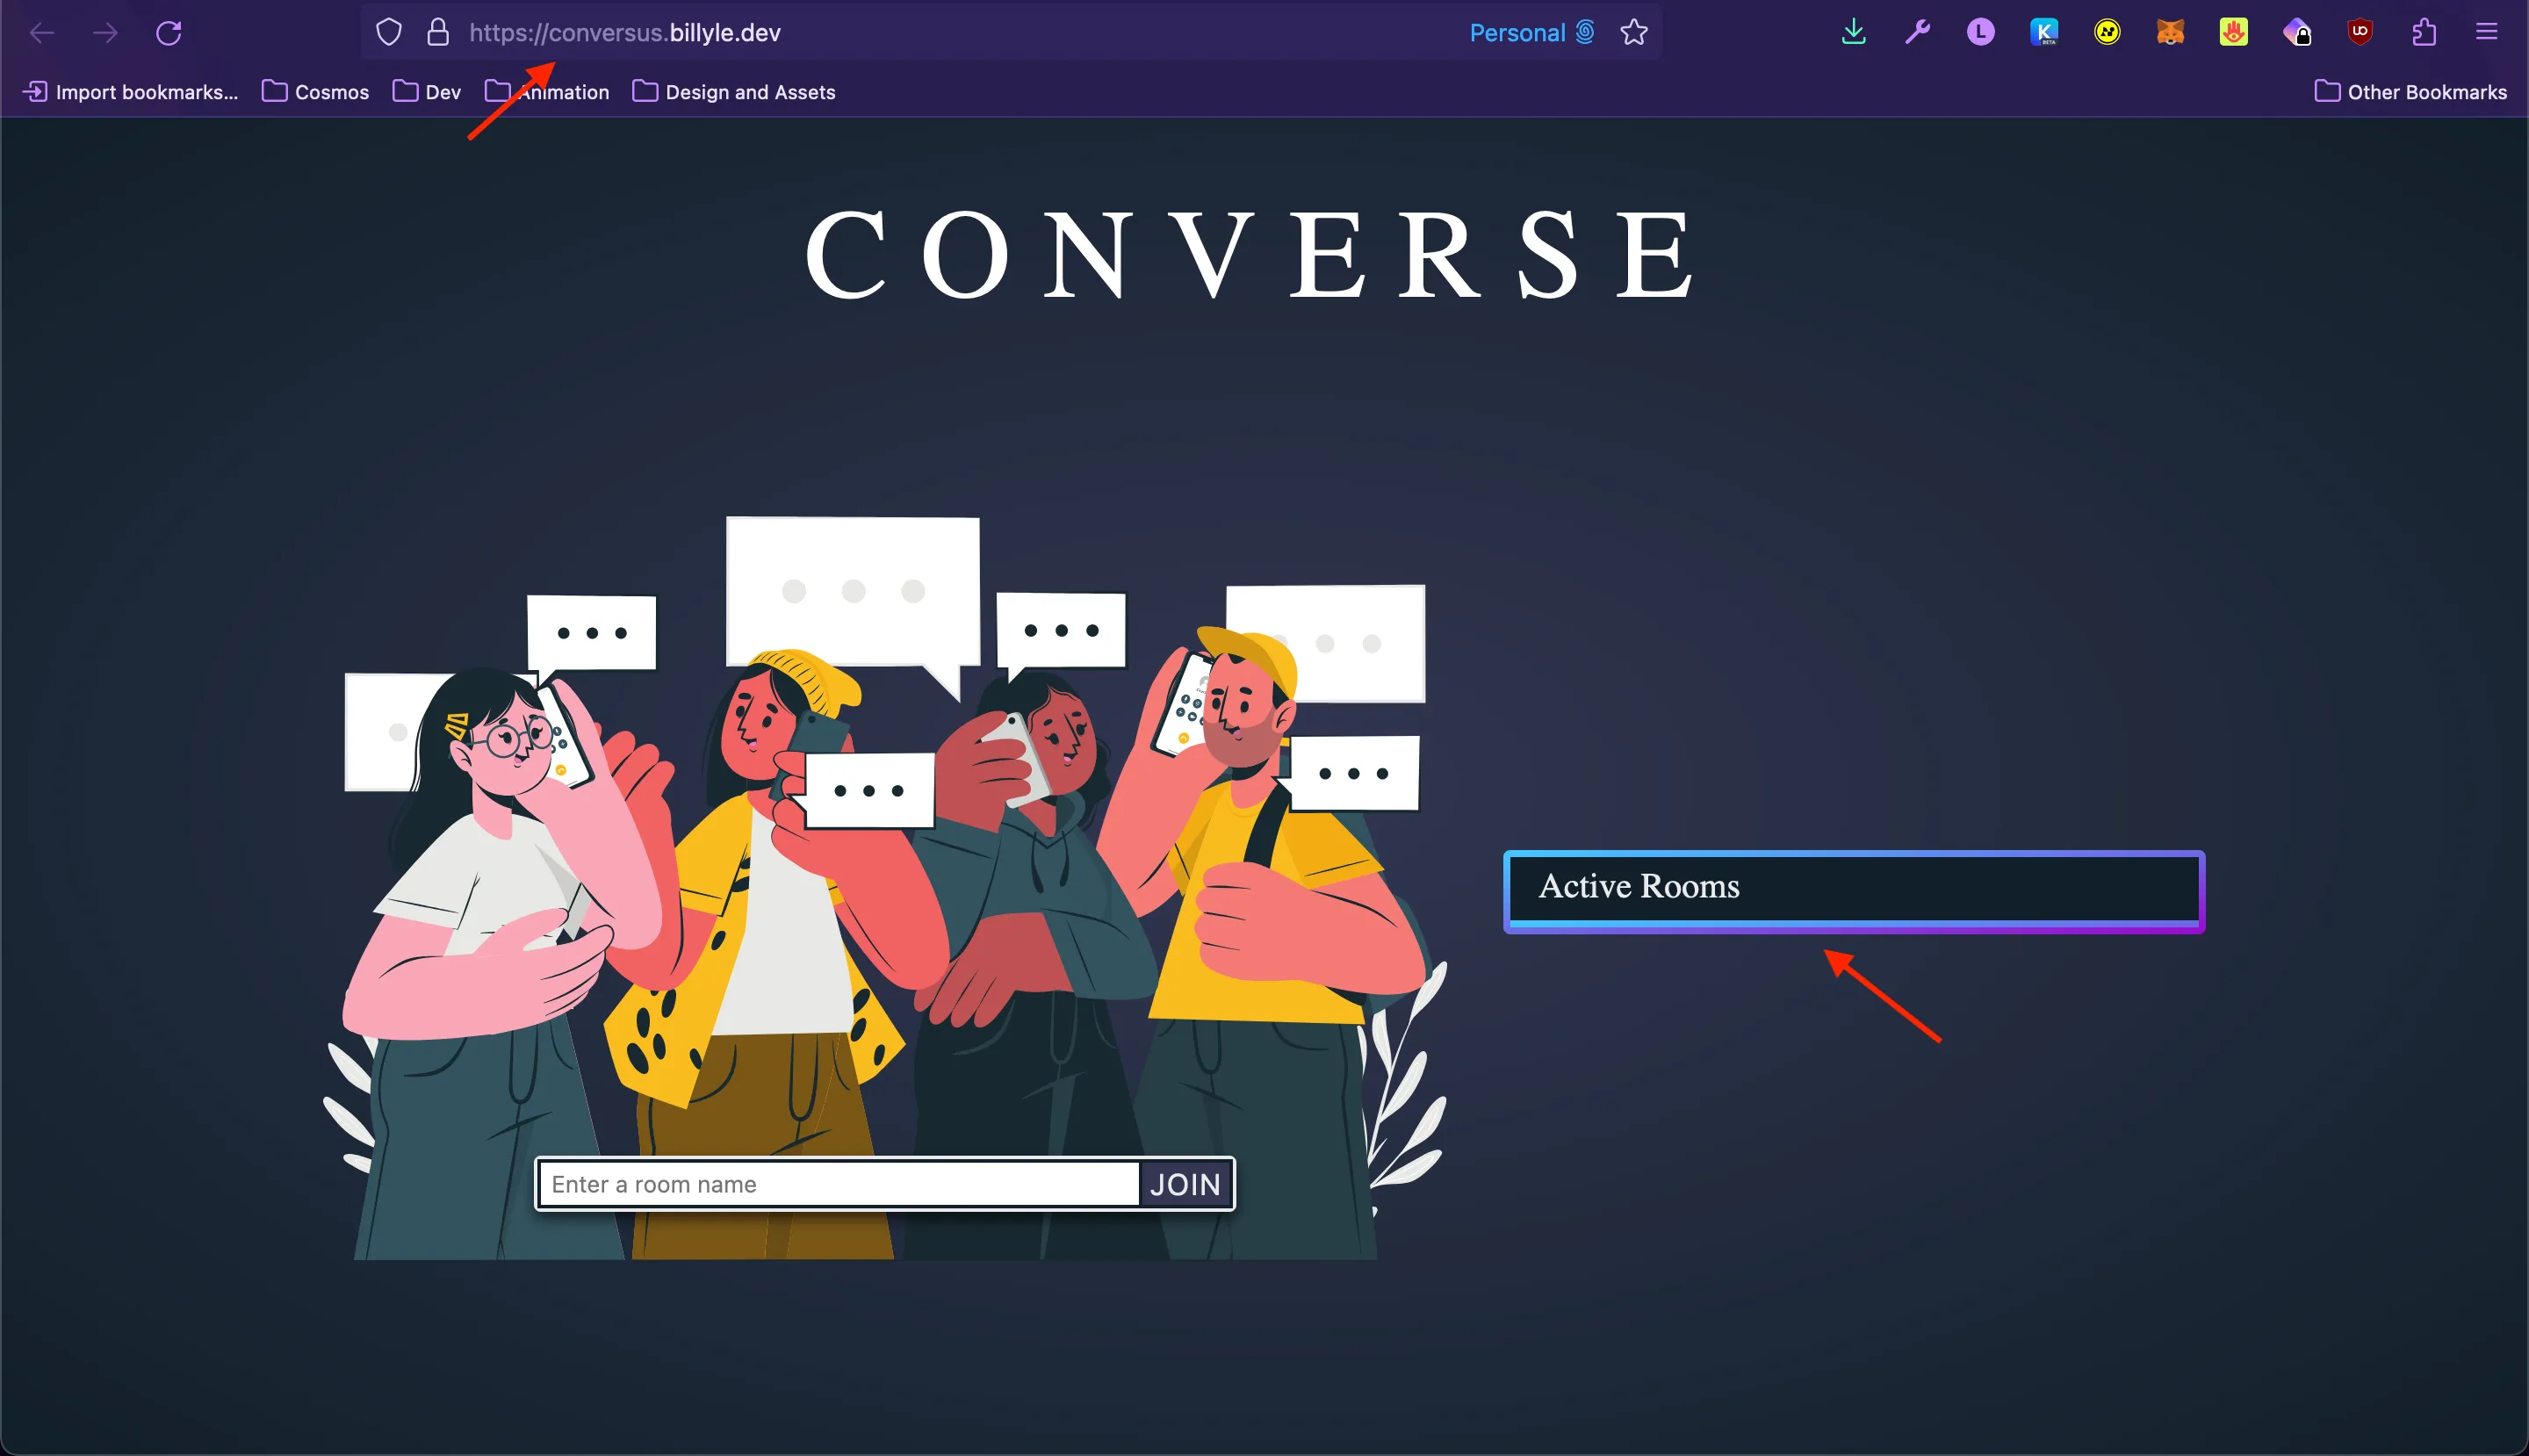
Notice the URL is now conversus.billyle.dev. We deployed an app on the conversus subdomain on our shared domain of billyle.dev. This shows you the power of Coolify being able to host multiple apps under one domain.
I have a UI bug where the list of active rooms is collapsed, and I want to set a minimum height. This is a good opportunity to show you the Preview Deployment feature.
I created a fix for this repository and pushed it onto GitHub. When we create a Pull Request to the master branch, the GitHub App “billylecoolify” we created earlier will trigger a build. It will even leave a comment in your PR to show you how you can view the Preview Deployment or check the build log.

Talk about awesomeness! It’s integrated in our GitHub Workflow now.
Let’s navigate to the Deployment build list.
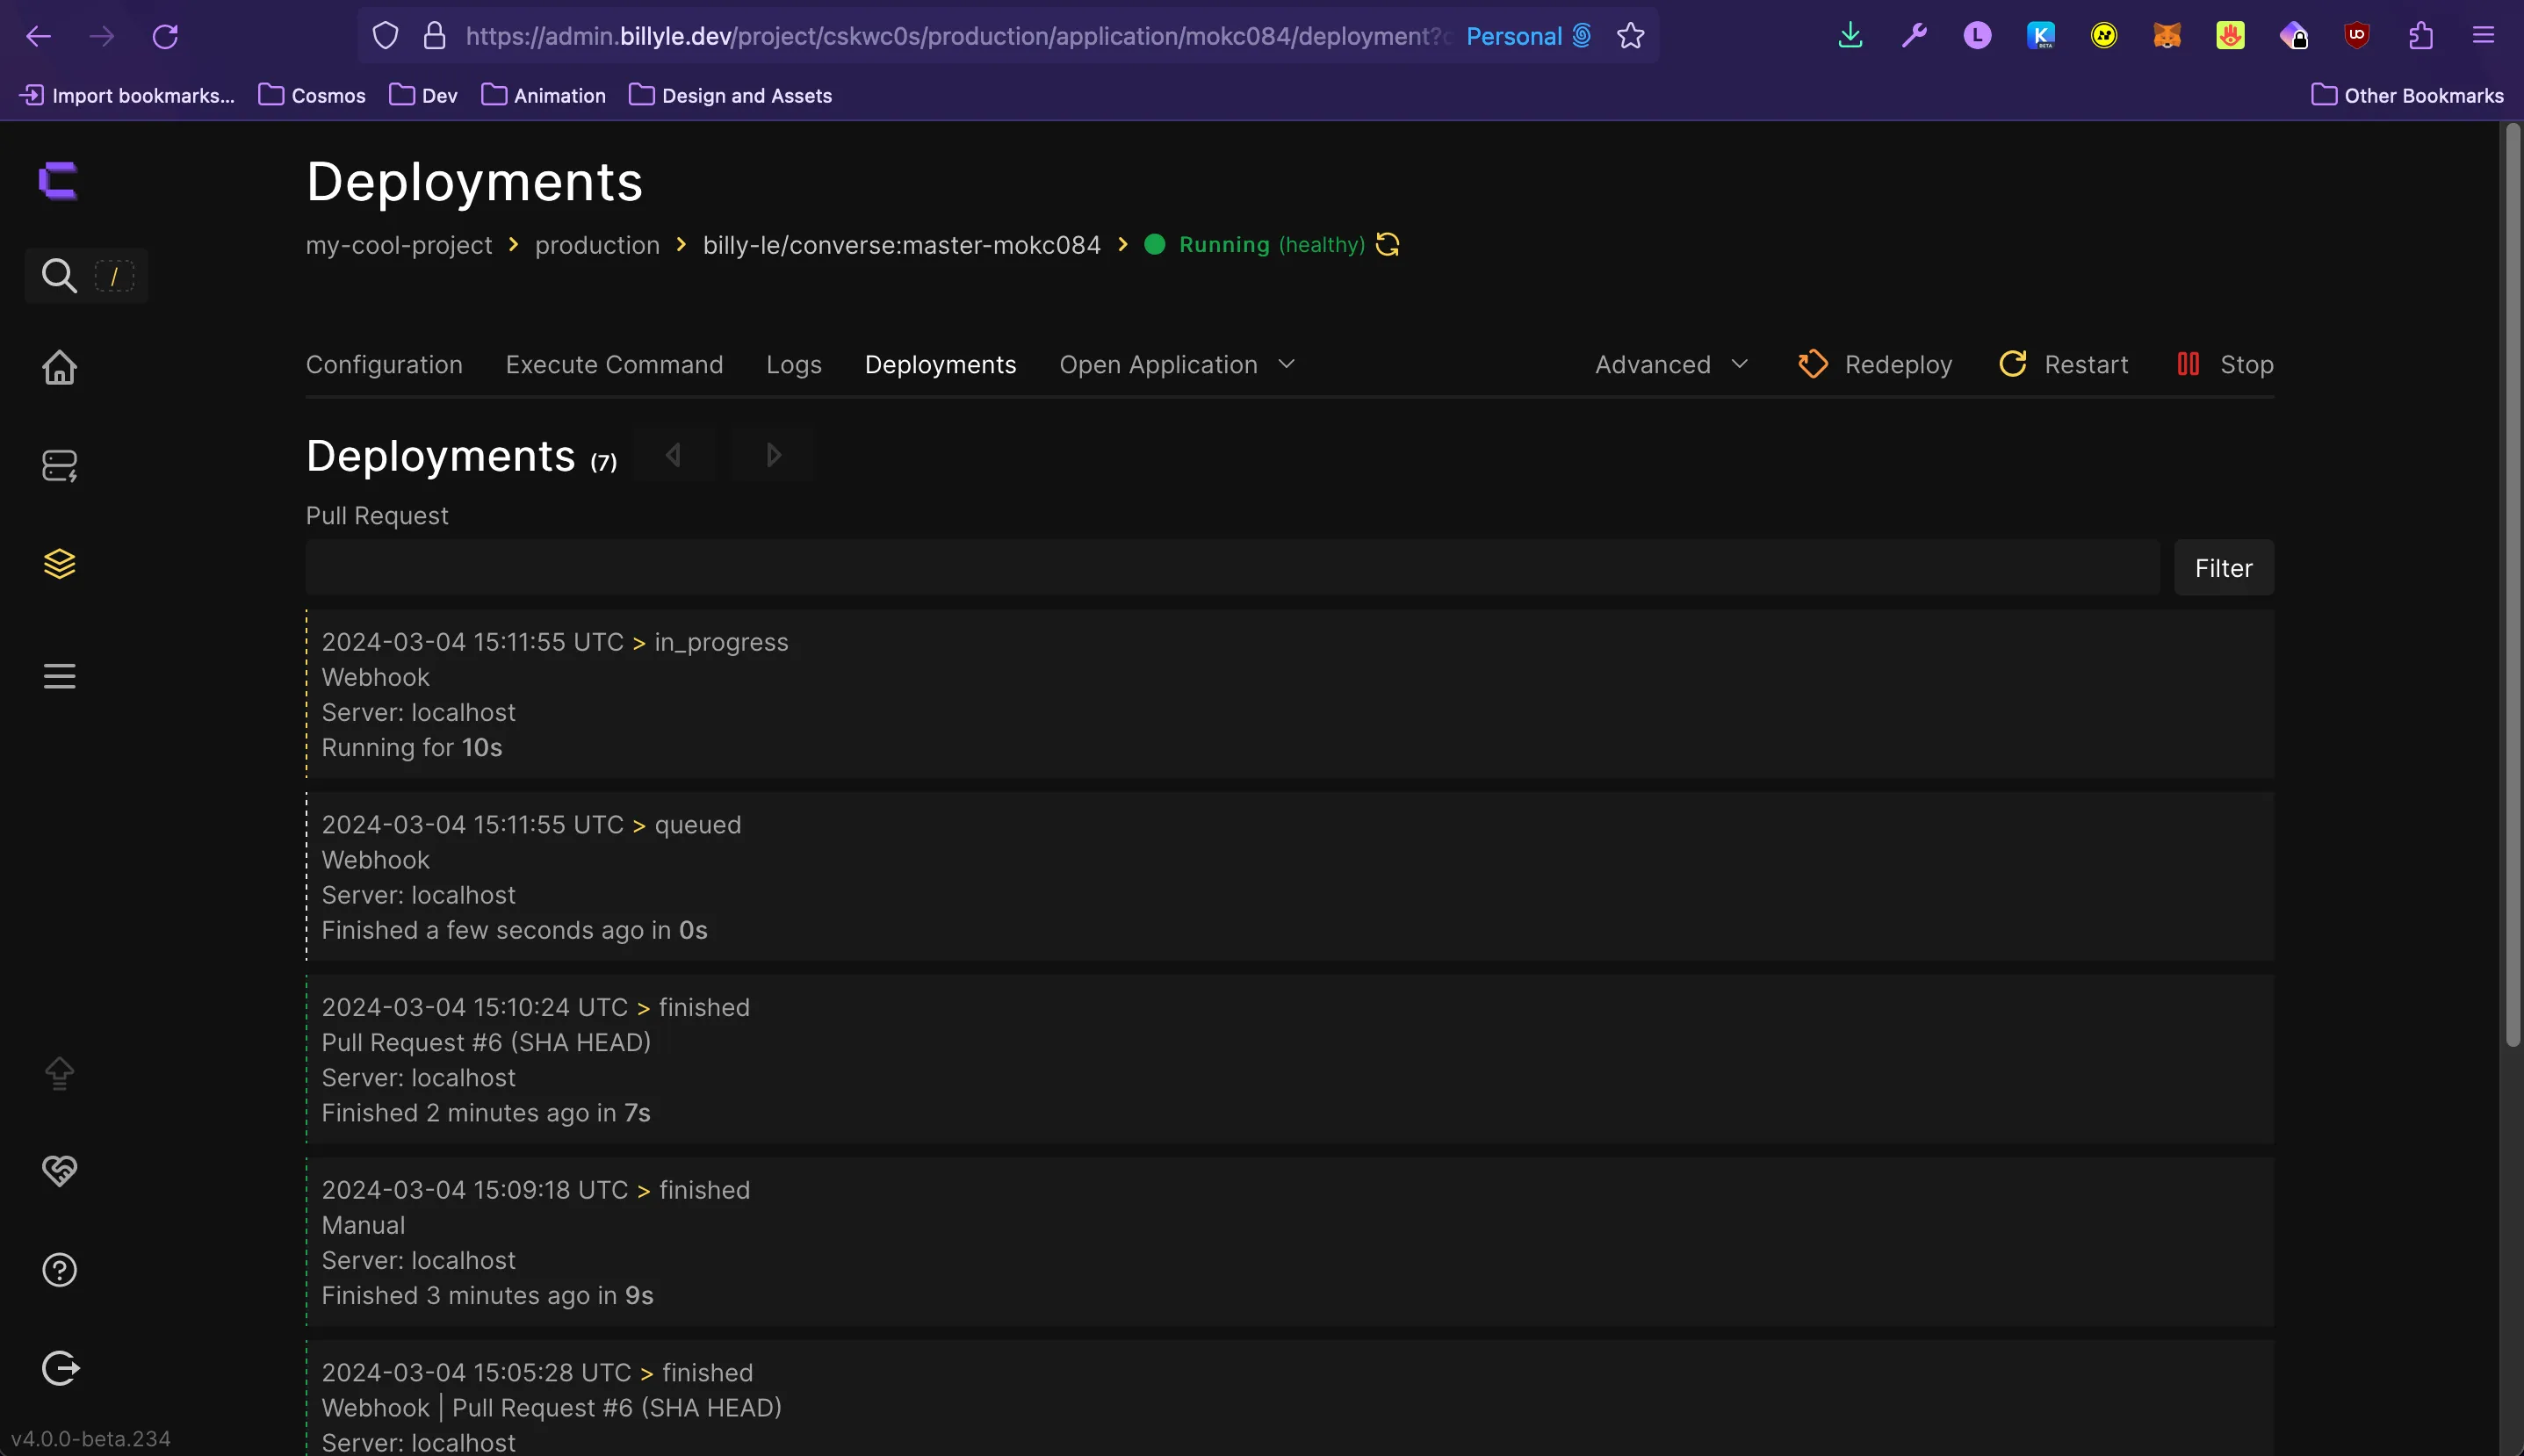
You see that the latest deployment shows that it was triggered by a “Webhook”. We now know it’s working. Let’s click into our build and see how things are going.
Not much has changed from before. The build should be completed and say that the deployment is “Finished”.
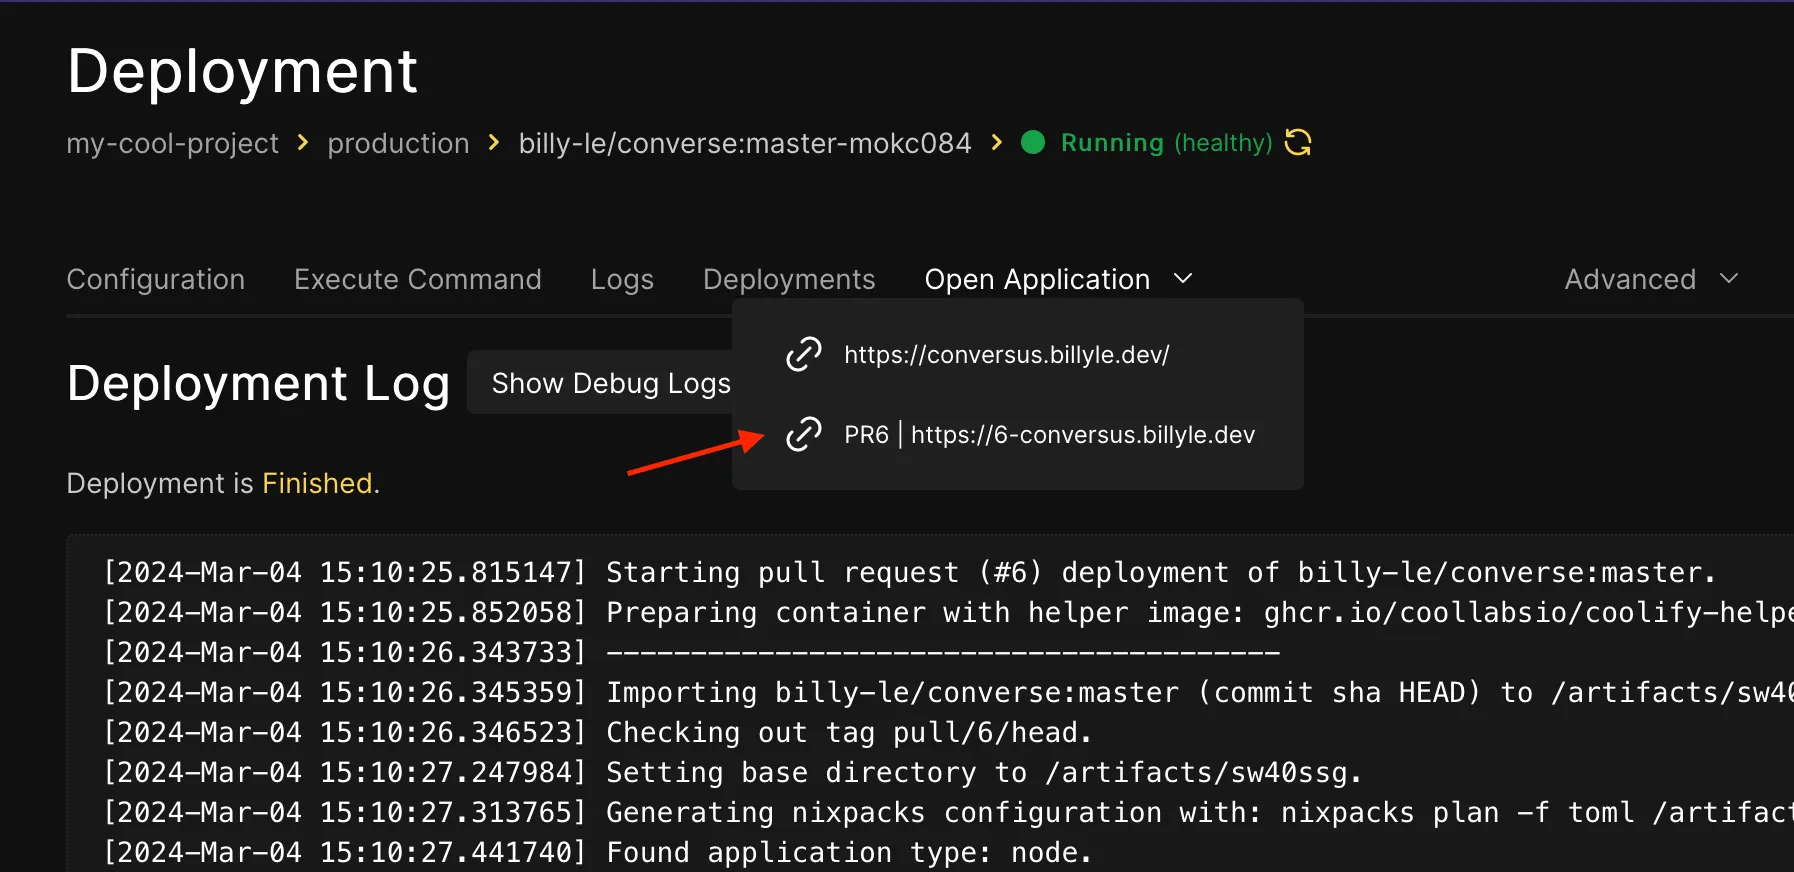
Let’s check out what apps are available to view by clicking on the “Open Applications” menu.
You should see a new app called, <pr_id>.<subdomain>.<your_domain>
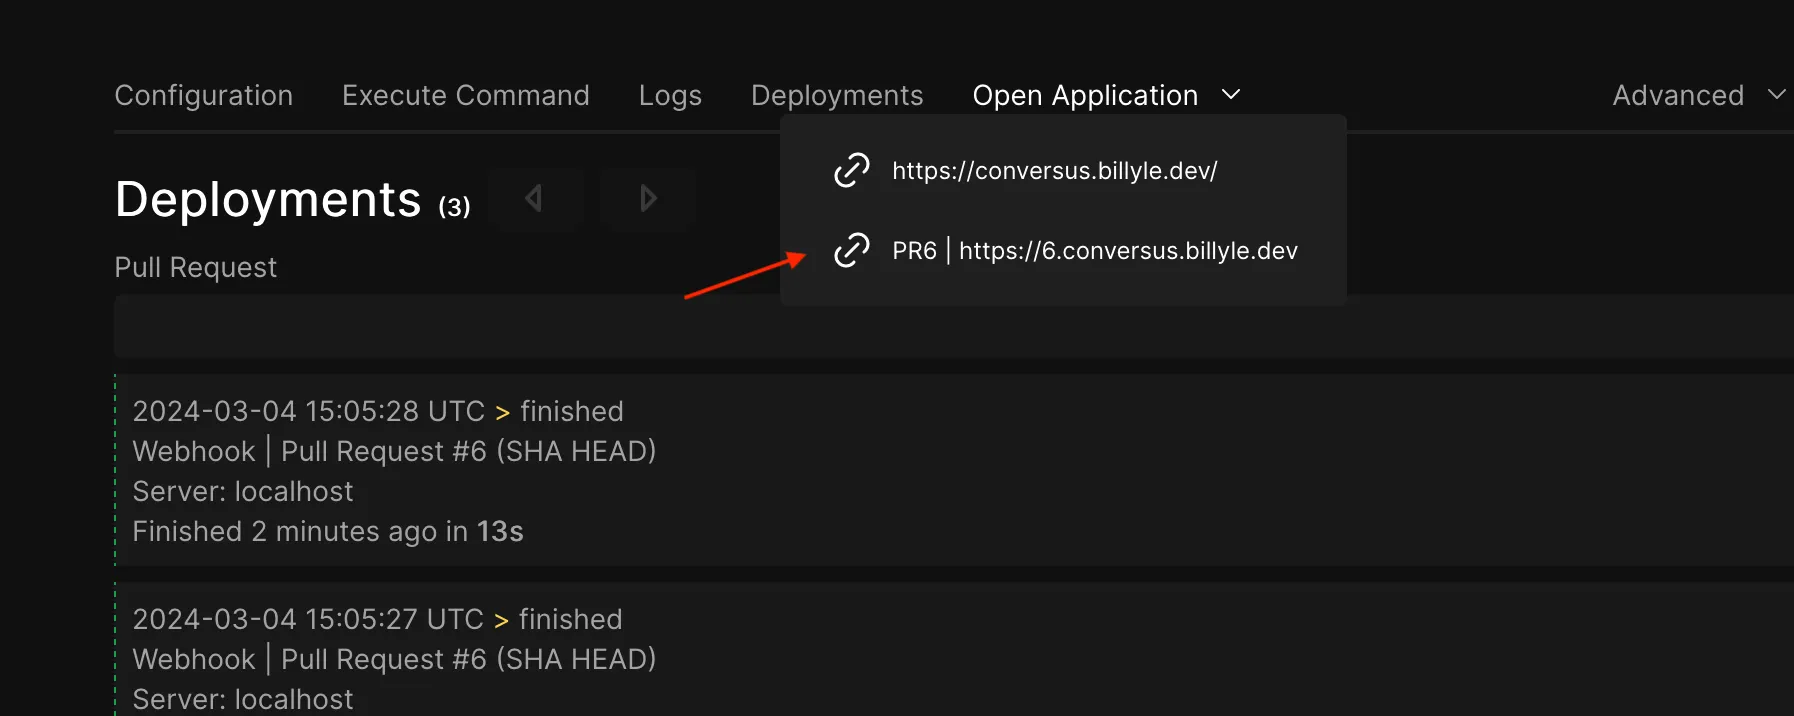
The PR ID is the Pull Request ID retrieved from GitHub. The subdomain is what we entered when we configured the app.
So let’s try opening the app now. Click on it and see what happens.
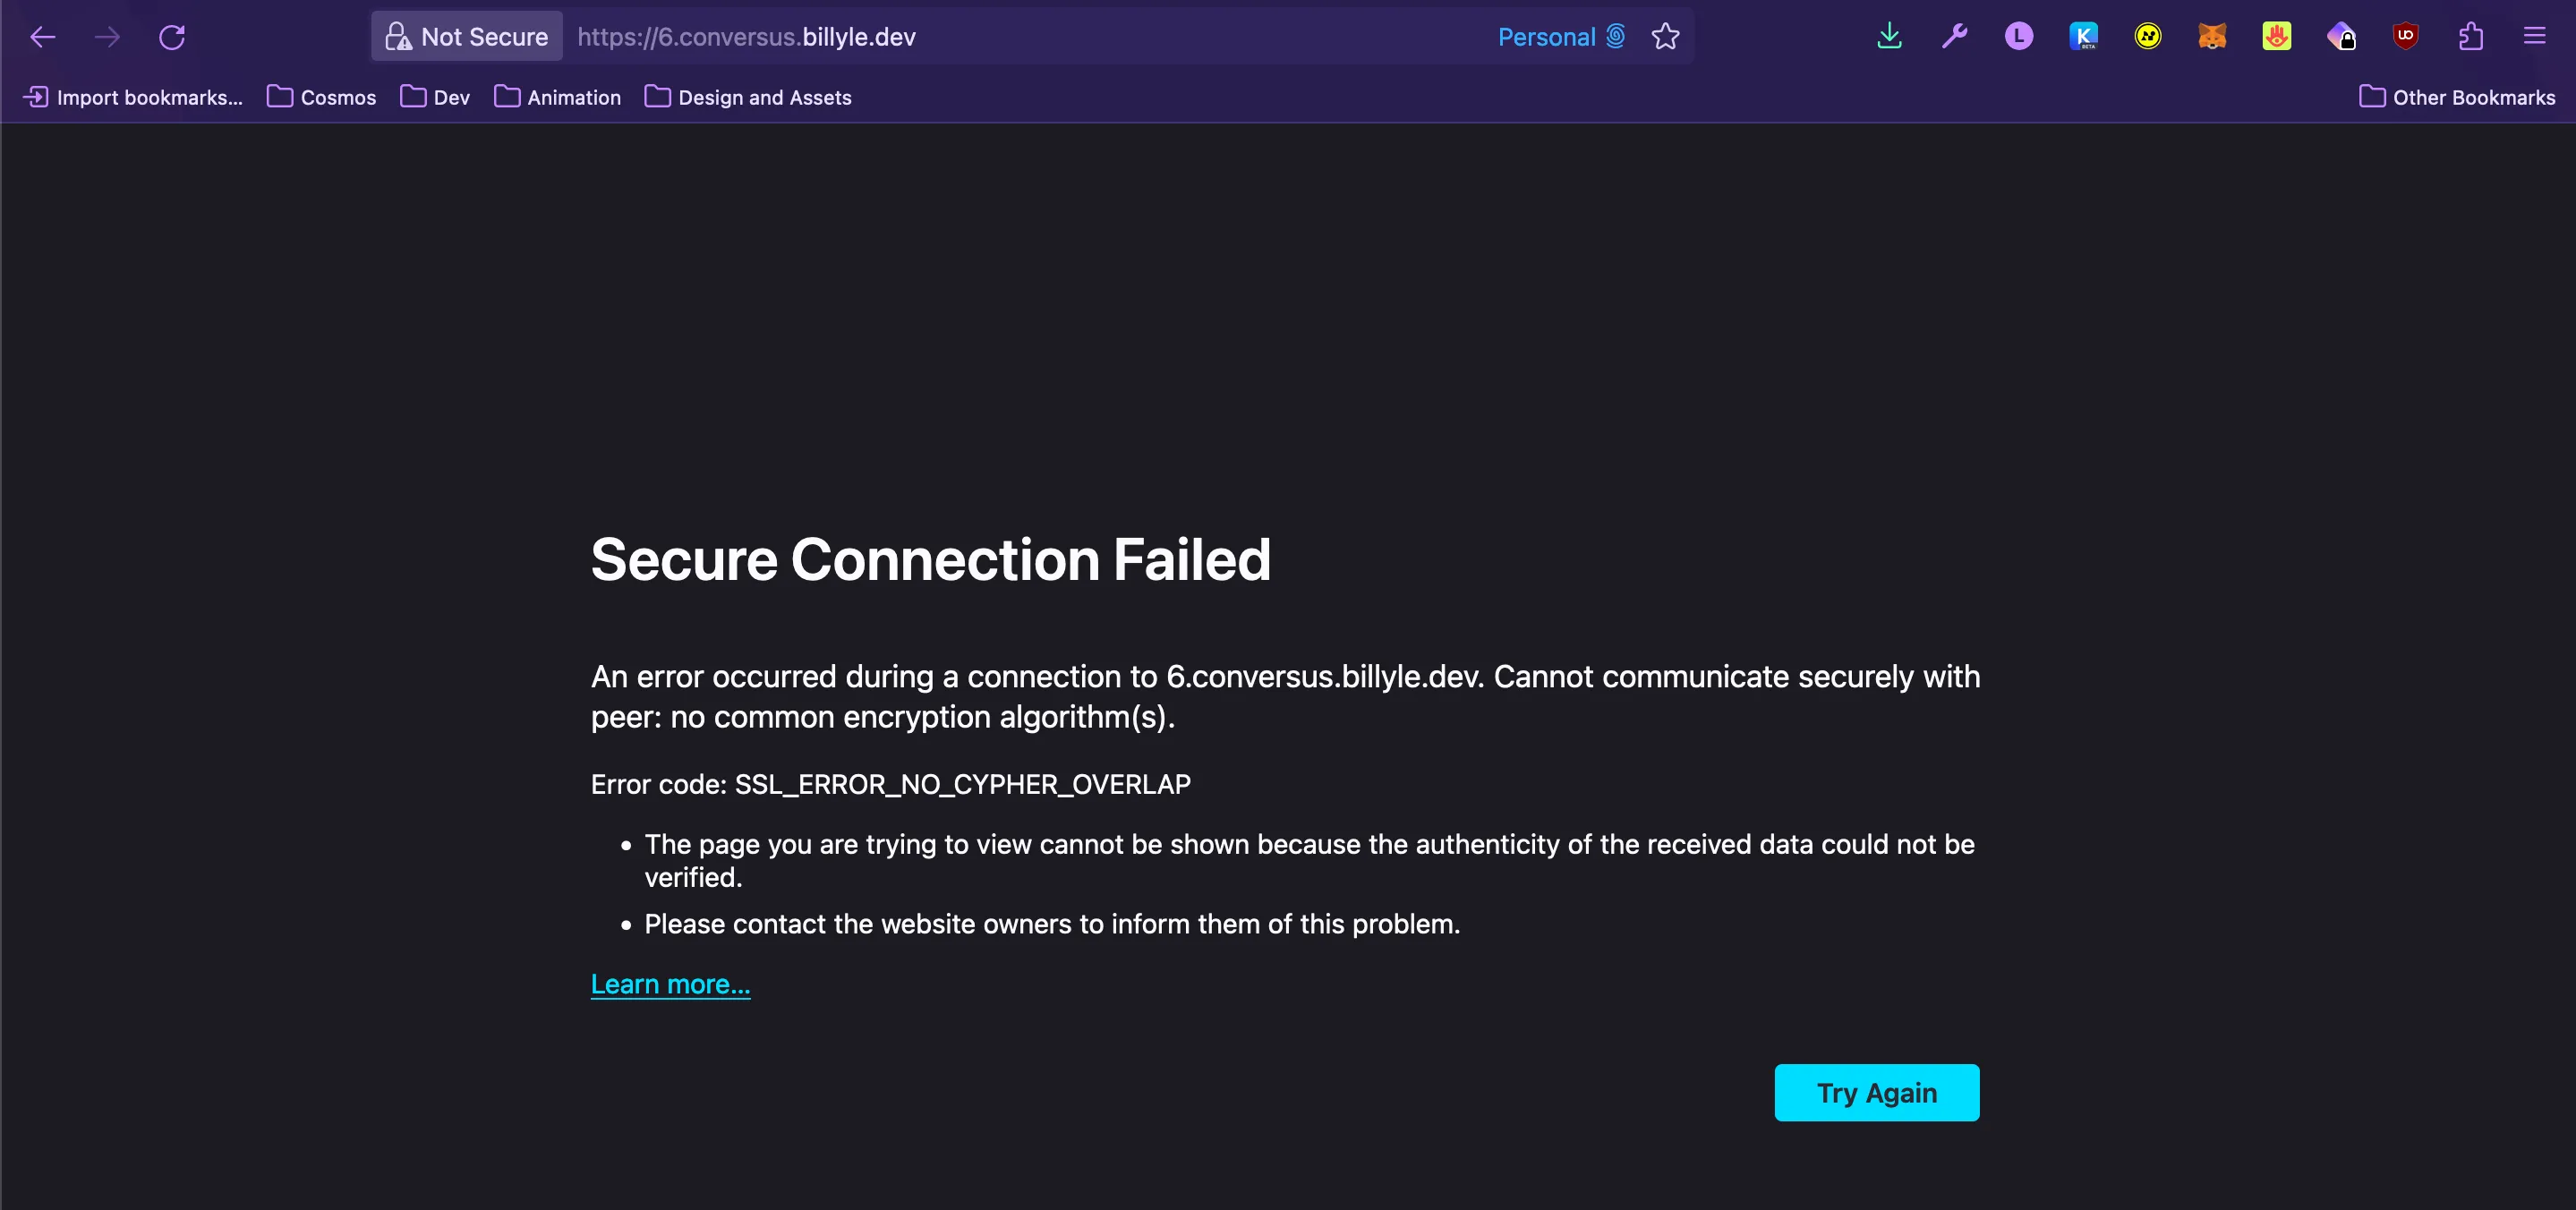
Opening it on Firefox and wait… oh no! What error is this?! Seems like I have an SSL error. I’m not sure what’s going on here, but I believe my DNS doesn’t like using sub.subdomain.domain which might be causing the error. How do we fix this?
Luckily, we can configure how our Preview Deployments are named. Let’s do that now.
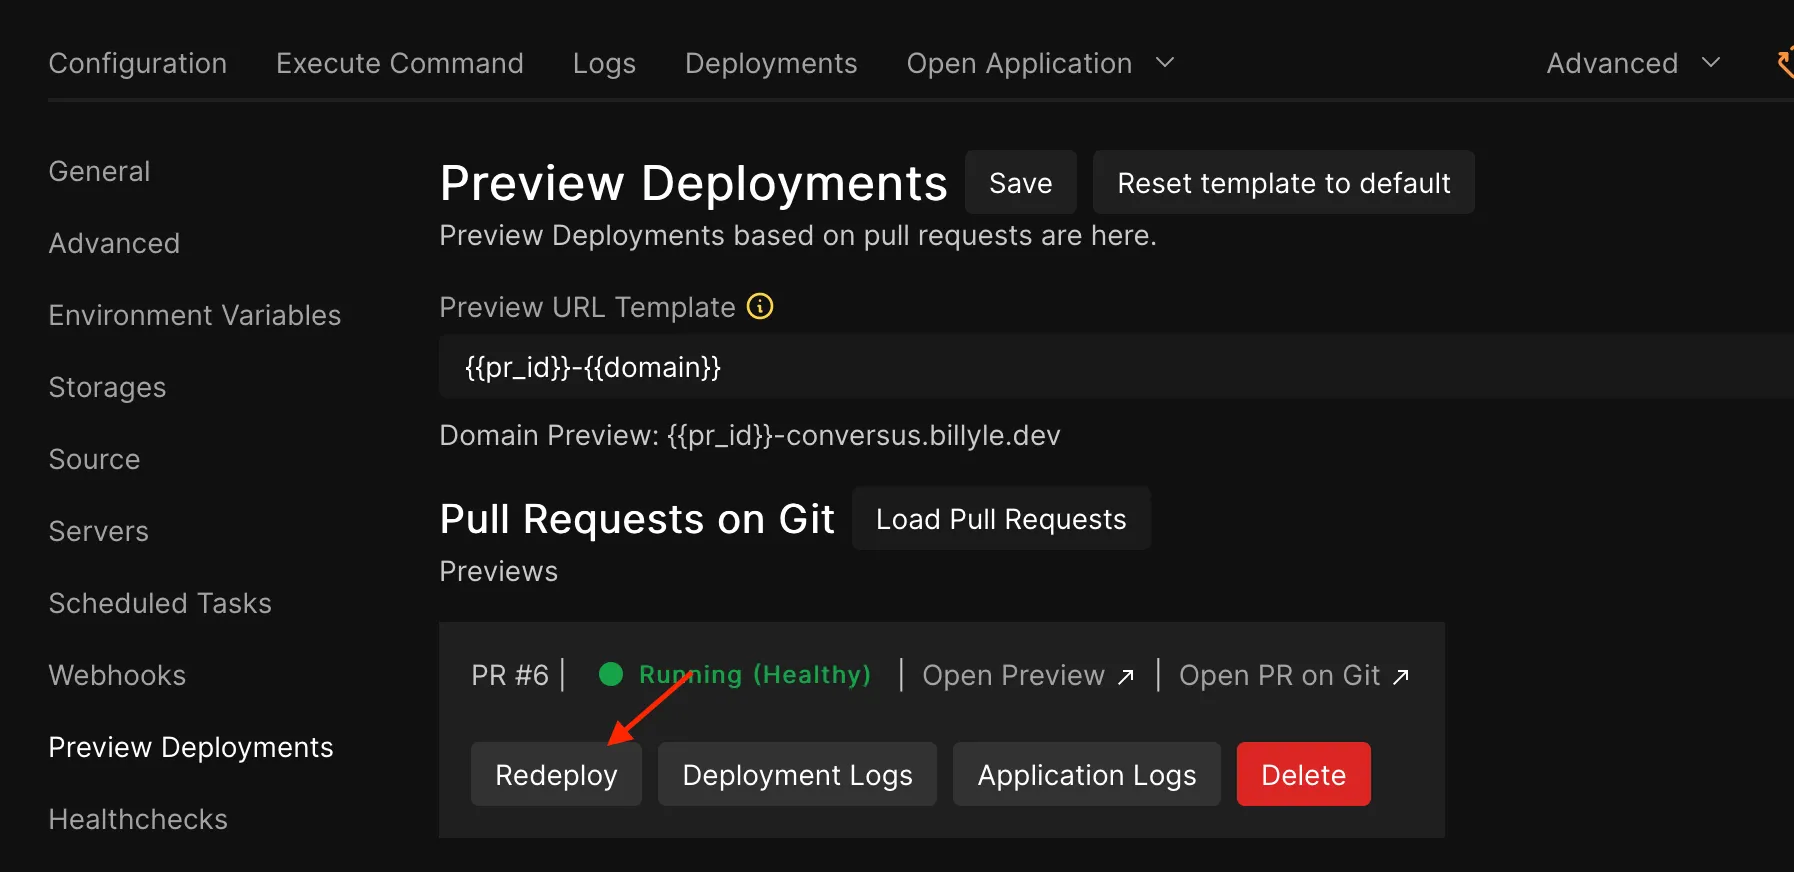
Back on the Configuration page, you will see a “Preview Deployments” menu item. Let’s click on that and bring up this page.
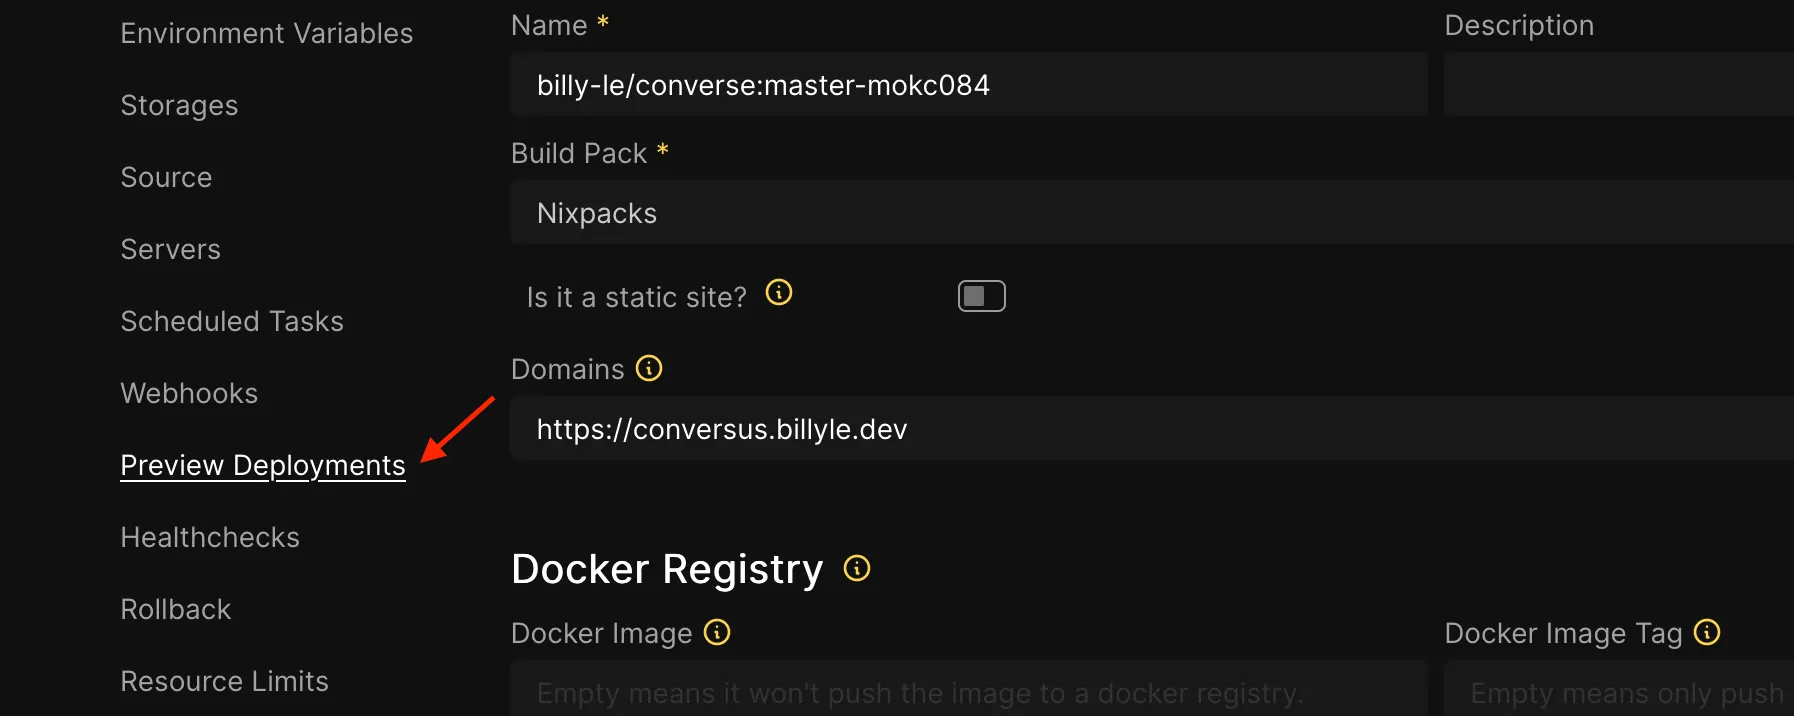
You will see a field, “Preview URL Template”, where the default value is: {{pr_id}}.{{domain}}. If you hover over the field label, you can find more template tags to use.
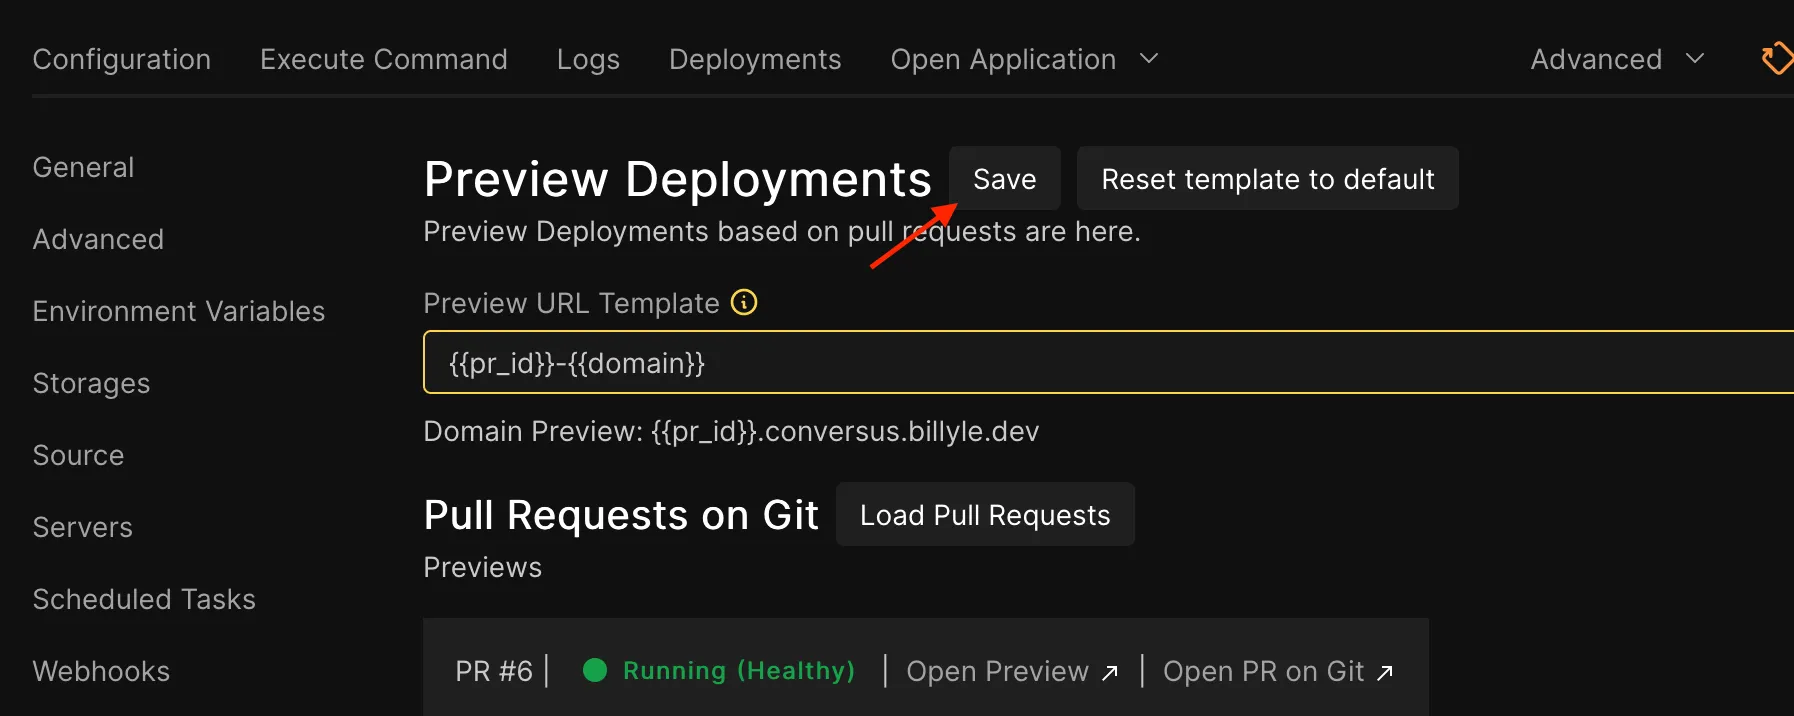
So instead of having a dot separator, I’m going to use a dash.
From this: {{pr_id}}.{{domain}}, to this: {{pr_id}}-{{domain}}
Be sure to click “Save”.
Now that we have changed our configuration, we need to redeploy our Preview Deployment build so that we can see changes to the URL.
On the same page, there will be a list of open Pull Request Preview Deployments. Find the one that matches your PR ID and click on “Redeploy”.
Two things will happen now. First, you have just triggered a new build so if you go to the Deployments tab, you will see a new build running that was manually triggered.
Second, is that the GitHub App will create a new comment on your PR to the new Preview Deployment and build log.
Let’s wait it out for the deployment to finish and see what available apps there are.
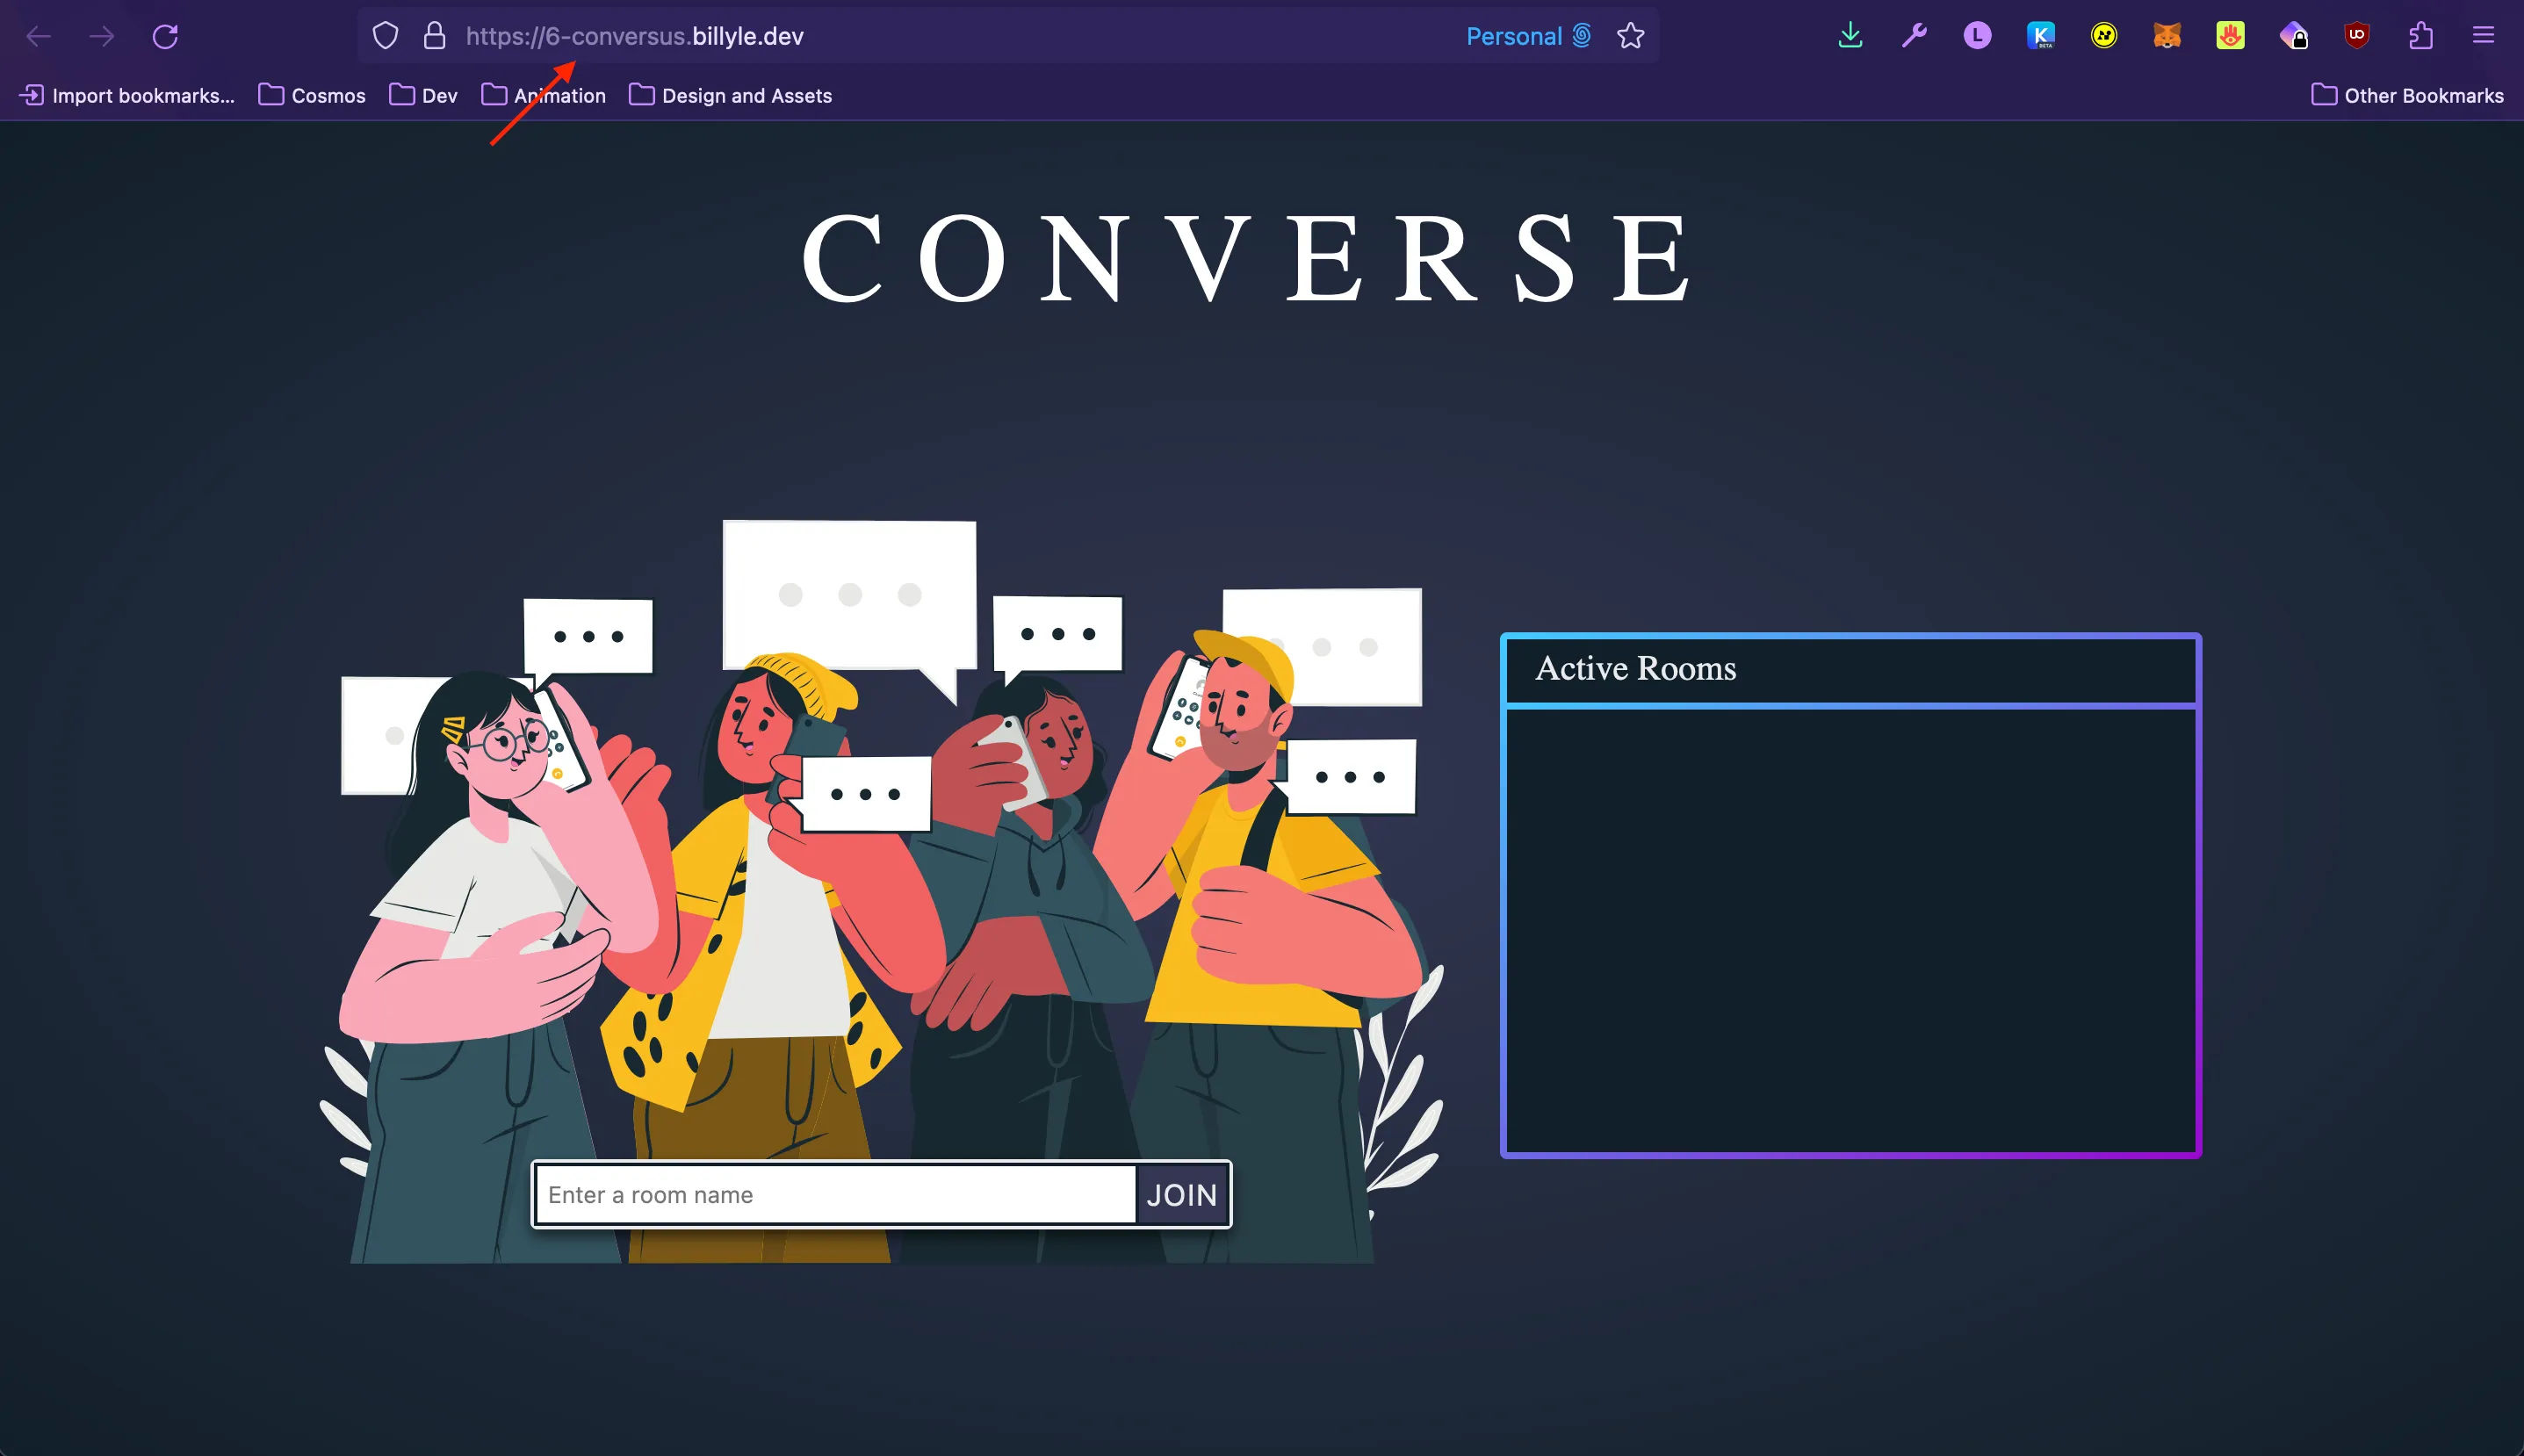
Great! We see the updated URL, 6-conversus.billyle.dev, and I can view it without any issues.
This is so cool. I can see the changes are working from the PR! If it doesn’t work for you because the browser is complaining about SSL, just give it a few minutes and refresh the page again.
Cleanup and Merge Pull Request
Okay, everything looks well on my end. I’m going to merge and close my Pull Request.
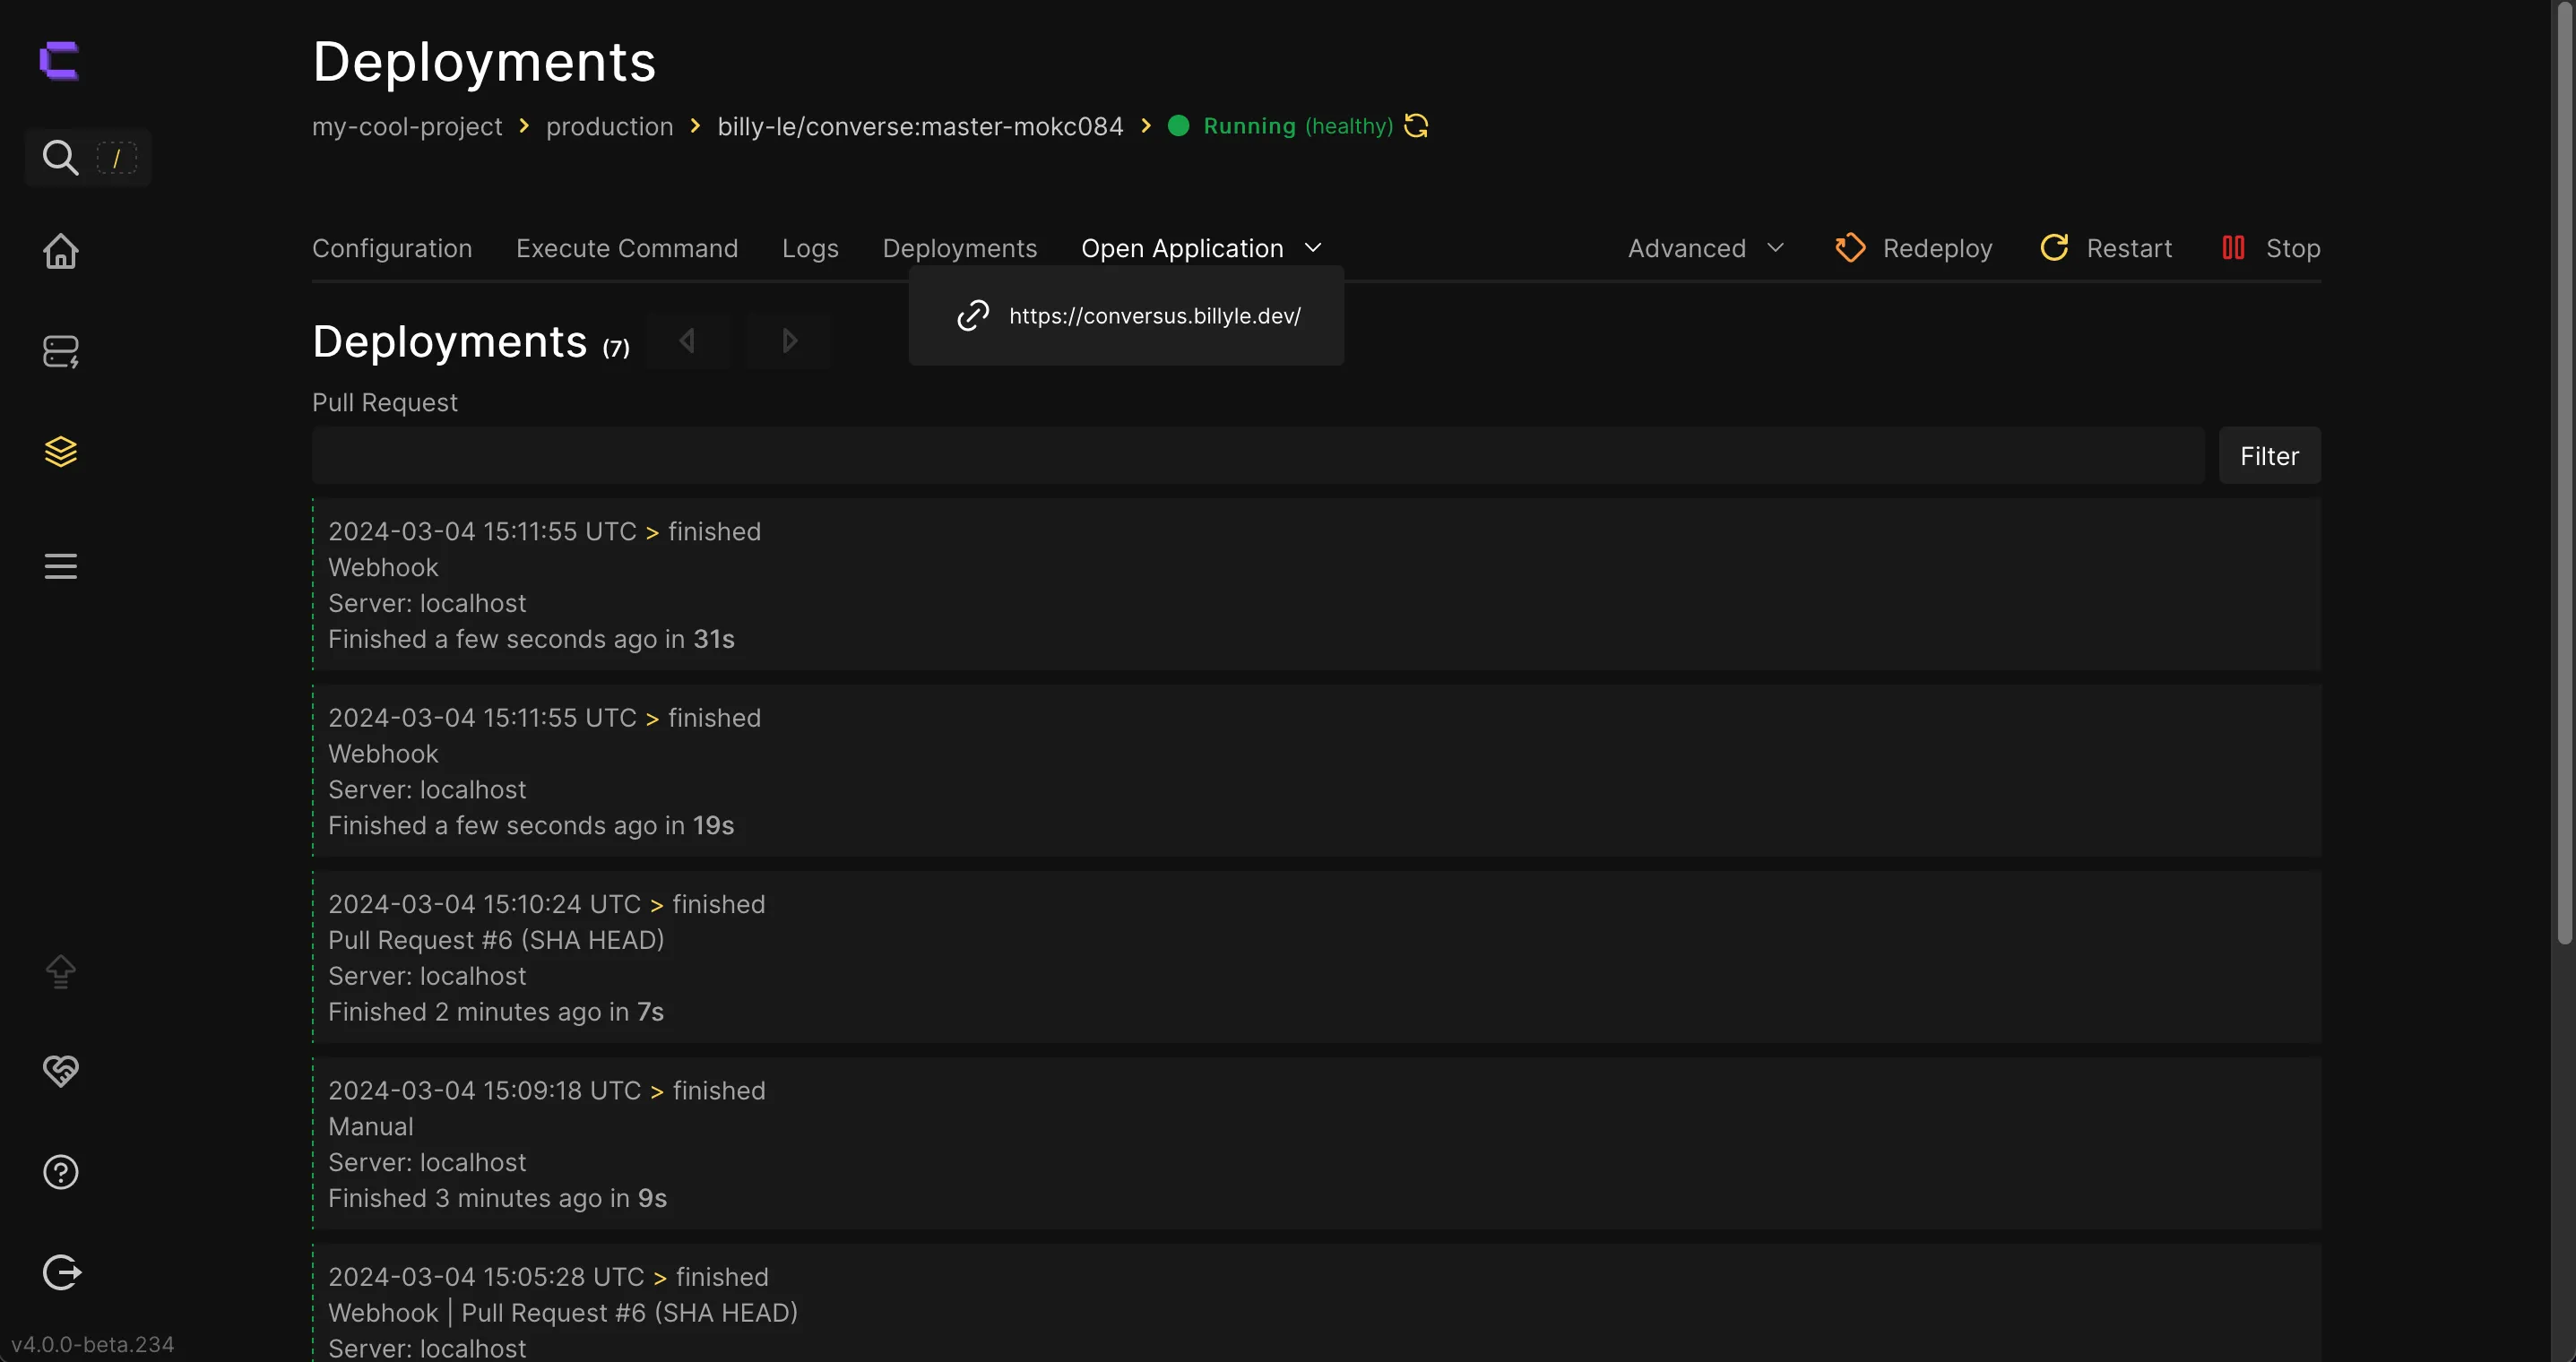
What Coolify does in the background is trigger a new build for the updated master branch and remove the Preview Deployment builds from our application automatically because it’s no longer needed.
You can verify this by going to the Deployment list and checking the dropdown lists of available apps.
If you do need the preview deployments to stay, I’m not sure how that’s done yet, and it’s better if you ask a question in the Discord channel.
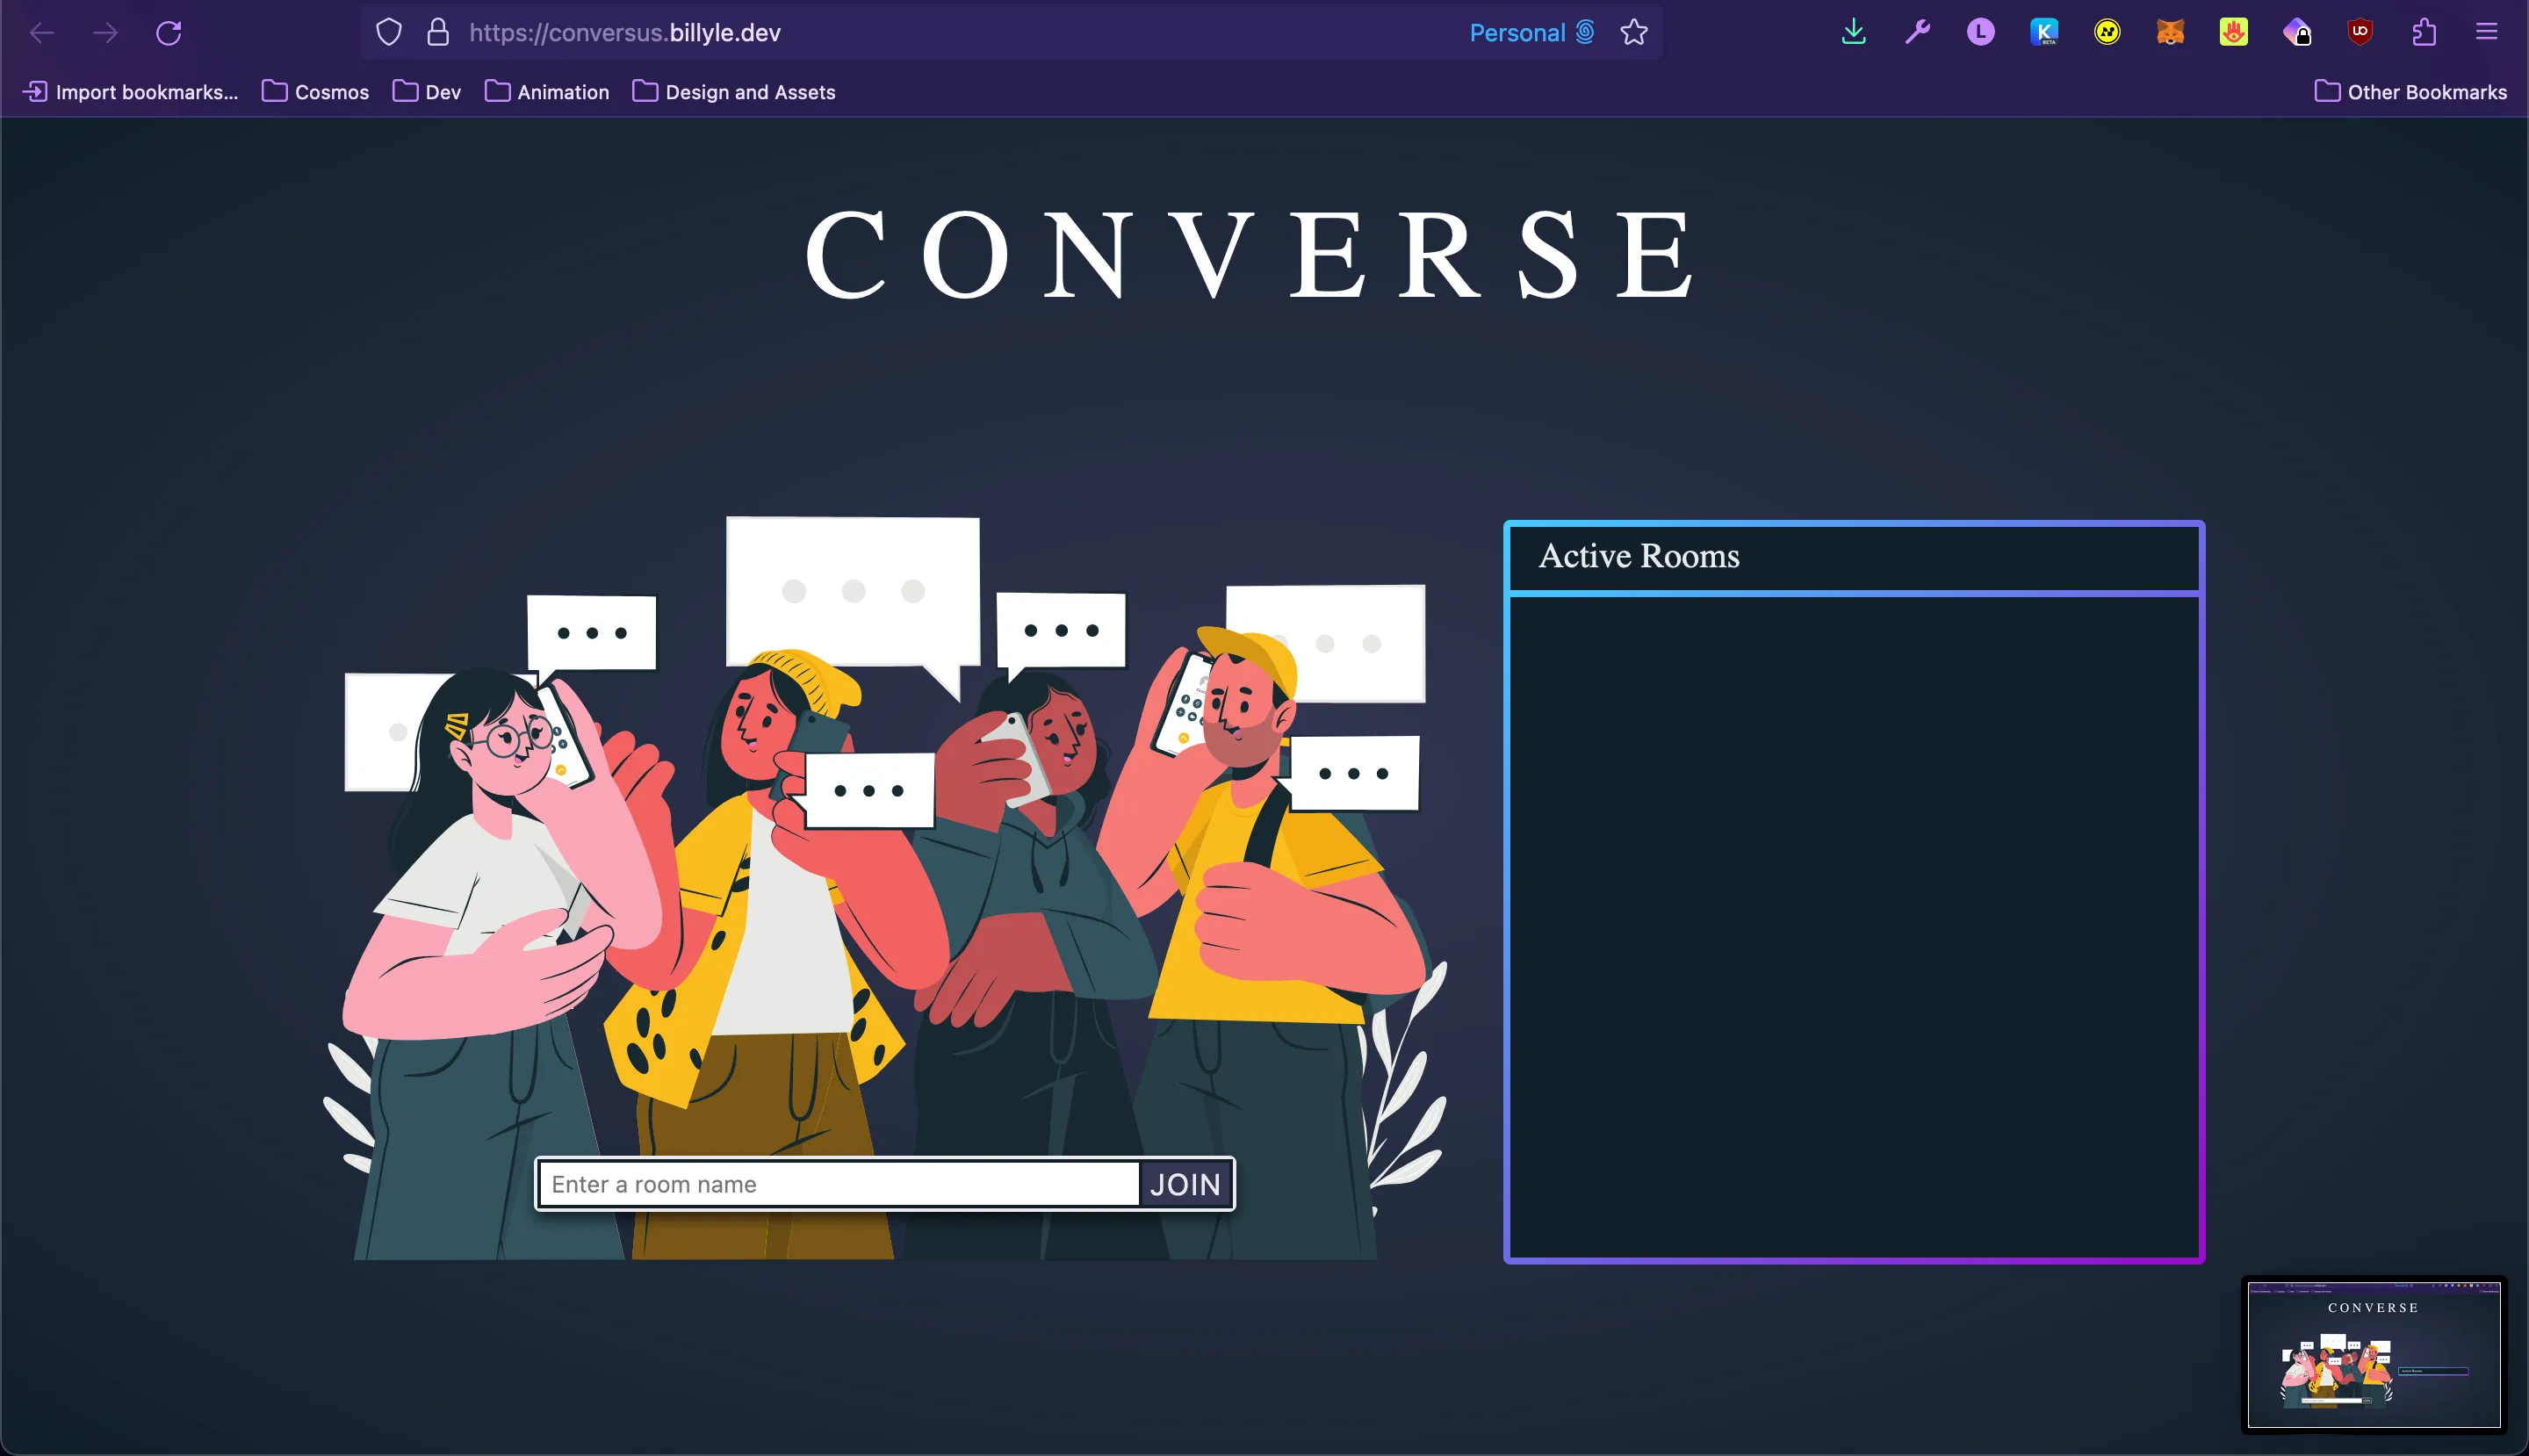
Finally, I can check my application and verify that the new code is working.
What you learned
Wow, so many topics were covered in this tutorial! I hope you made it this far and got some value of out it.
You’ve learned how to use Coolify to create Preview Deployments for your Pull Requests.
To get to this point, there were several steps like setting up your DNS to accept subdomain wildcards. We then had to use that in our Coolify server as well and give it a wildcard domain so that it would auto-generate subdomains for us.
The next steps were to create a Source, in our case the GitHub App, and grant it permissions to our GitHub account. We started a new project and then added a resource that pulled in all of our repositories.
Once we selected a repository, we updated our subdomain name, preview URL template, and turned on Preview Deployments.
There were a few mini-steps in between, but that was the gist of it. I’m confident that you can do this on your own with your applications. And if you ever need help, you can reach out to me from one of my socials.
Good luck and I hope you create awesome things. Until next time, have a good one!
